I love making seafood dishes at home, but sometimes it becomes cost prohibitive when you need multiple kinds for stews like this cioppino. Enter Harvest of the Sea’s frozen seafood medley pack. One bag contains a generous combo of Asian shrimp, Indian-wild-caught calamari, Argentine scallops, and Canadian Prince Edward Island blue mussels. They’re available at Costco in the Bay Area, San Diego, Los Angeles, and Texas; soon they’ll be in the New York area too. With Harvest of the Sea’s seafood medley, all you really need is your imagination to bring in your favorite restaurant seafood dish home.
Ingredients: olive oil 1 onion, sliced 4 garlic cloves, roughly chopped 1/4 cup tomato paste 1 28-oz can of diced tomatoes 1 1/2 cups of dry white wine 6 cups of fish stock; but chicken broth will do 2 bay leaves 1 bag of Harvest of the Sea seafood medley, thawed half a bunch parsley, roughly chopped salt, pepper
1. Heat oil in a large Dutch oven over medium heat. Add onion and sauté for 5 minutes. Add the garlic and continue sautéing for 3 more minutes. Season with salt and pepper. Add the tomato paste and stir until it changes color. 2. Add the tomatoes with the juice to the pot, along with the wine. Let the wine reduce by half, stirring occasionally. Add the stock and bay leaves; season and bring to a simmer. 3. Stir in the seafood and simmer gently for another 8 minutes. Stir in parsley and turn off the heat.
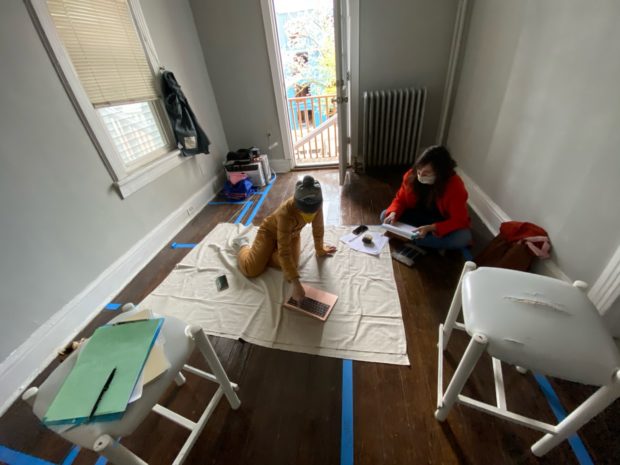
It’s been a month and half since we closed on our new-old house and it finally feels like something is happening! We officially committed to the same firm that helped us decide that we should make an offer after going over all the possibilities that the bones and current structure of the house provided. We met with our project manager and designer in person and gave them an on-site walkthrough of our wish list. We then sat down with our designer to define our style. I tried to prepare for the meeting by writing down all the words that appealed to me: clean, functional, light floors, Portuguese tiles, antique-looking, vintage, farmhouse, but not cottage, black windows, white cabinets, pop of color, some texture, surprising element, unexpected, highlight, island, easy to clean, usable, workable, spacious, open, airy, cozy, Atelier-style windows,natural light, sunlight, plants, green, comfortable, lived-in, some open shelving, glass uppers, lots of storage and on and on!
But how do you define your style when you like almost everything that you see on design magazines and Instagram? How do you narrow down your likes and have a cohesive style throughout the house? How do you communicate this to the team implementing the design of your forever home?
Sitting on the floor and going through my super organized Pinterest board
I reorganized my Pinterest board last year when we started looking for a house. We went room by room and talked about the most recent design details I’ve liked and showed examples to our designer. (For easier writing, I use “I” here because I’m louder than Alec; but trust me, he has veto power.) Every time we looked at something, I always ended up adding how I operate in that room, so we immediately knew everything had to be functional. Streamlined hardware on kitchen cabinets are nice to look at, but how do you open them when your hands are full or dirty?
I also used to go antiquing and my apartment in Harlem started off with the “shabby chic” look: the more wear and tear and distressed, the better. I’ve strayed from that style in the last 10 years but I found myself still attracted to that piece de resistance; that one item that pops out as unexpected in the space. If I’m going to have a functional kitchen, I don’t want it to be too uniform; I still want that antique work table as a food prep station.
When it came to colors, I gravitated towards a lot of white for airiness and lightness, but with a combination of black to highlight a section; I also liked some natural colors to balance them out. I am not afraid of pattern or texture because I want that surprising element. After almost two hours of discussion, we settled with “functional Scandinavian farmhouse”.
This style will often feature unfinished wood throughout the home, large windows, lots of whites along with the occasional black contrast, and a minimalist approach to home decor. There are also lots of plants and textiles in Scandinavian farmhouse style, as pops of green and bursts of cozy fabrics keep a space from feeling too sterile.
That quote seemed to summarize it all, even though I didn’t even put weight on my plant collection! Overall, it was a good exercise to have an outsider look at what we want and define them in terms that can be understood by the trade so that everything can be professionally put together. We can’t wait for the next step: layout options for each of the rooms in our new-old house!
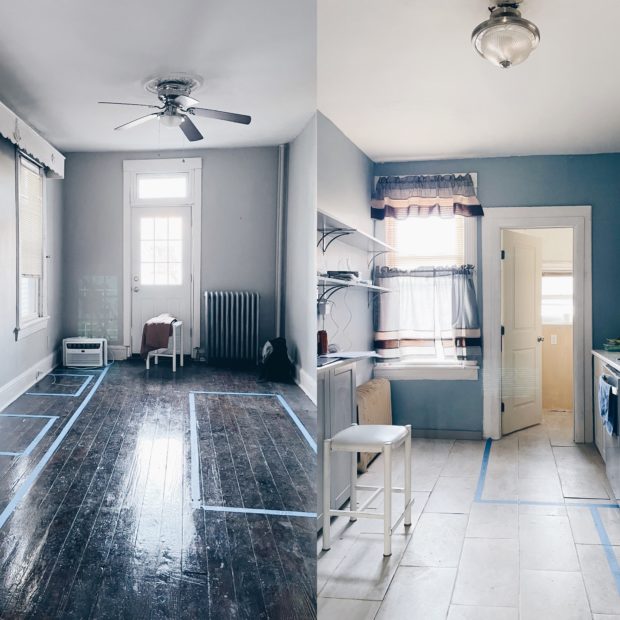
Right now, the kitchen and dining room are separated by a wall. We’d like to remove it to open up the space. As soon as it’s more open, there are a few things we want to do depending on budget constraints and time estimates.
The current dining room on the left; the current kitchen on the right
Extend the powder room inward to become a full bathroom
Blue tape to show the bathroom extension
We are starting with this item as a priority because we want to include my mother in our plans from the very beginning. Life changed for me and the family when Momz got sick in 2015. She lost all sensation in her legs and her hands because of a still unnamed nervous system diagnosis. She was in a wheelchair and was helpless for a while and she had to work really hard to relearn the most basic movements.
Their house in Manila had to be retrofitted to accommodate her needs. We added grab bars by the bed and in the bathroom, and built ramps to entryways. My parents even donated to the local church so that a ramp could be built for her and others.
She’s doing much better now but she still needs a cane to walk. But now that she’s on her own—my father was taken away from us in 2017—we want her to be as comfortable as possible when she spends her time with us. We want her to be able to move around the house safely, without stress or worry. And when Alec’s parents get older someday, we’ll be ready for them too.
Making the powder room a full bath requires taking up enough space for a walk-in/wheel-in shower from what is currently the kitchen. And since we don’t want the new opening facing out, we plan on making it perpendicular to the wall as a pocket door.
Move kitchen appliances to the other side
Blue tape to place the kitchen appliances in the current dining room
We won’t know how much work it will require to move electric and plumbing from one side of the house to the next, but considering the first point above, it’s the only way to fit all the kitchen appliances in a functional manner.
Using the measurements of my dream appliances, I used blue tape to account for everything to be able to imagine how the old dining area will become the new kitchen.
Open the back wall and create a picture window I’m most excited about cutting the entire wall facing the backyard to make a picture window and maximize the light. I would like to paint that wall black to make it pop out further. Depending on what kitchen island or work table situation we end up with, I will match its bottom with the same black color.
I’ll have separate entries about the designs of each space as soon as we get our contractors and builders to tell us the feasibility of everything. Stay tuned!
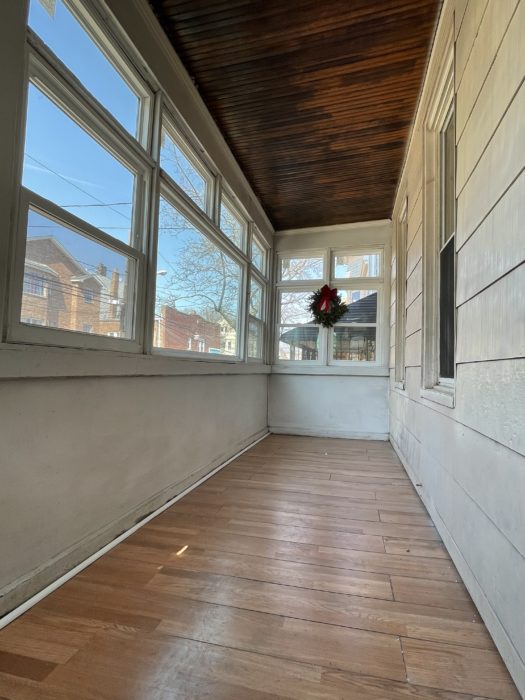
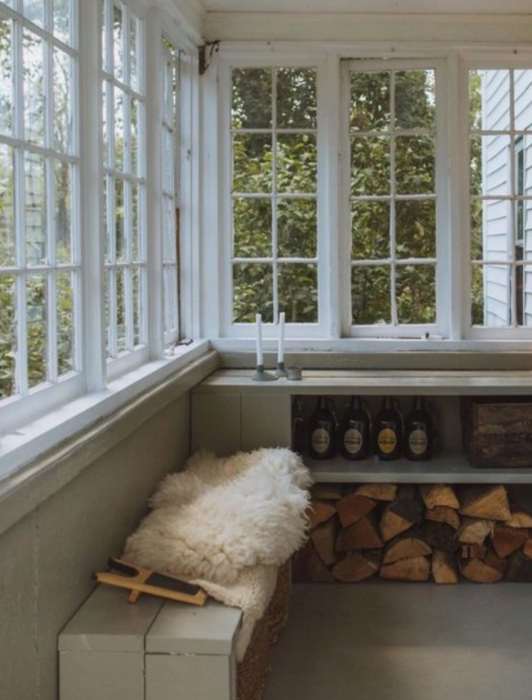
Even before we got the keys to our new-old house, we put the mudroom at the bottom of our wish list when we were meeting with contractor candidates. The house faces the street and anyone can look in through the wall of windows, so my initial thought was for it to remain as a place where you remove and leave your shoes before you step inside and never a spot where we can hang out. We’re not quite sure if it was an outdoor porch in its original form and then covered years later, but it sure needs a refresh.
The mudroom in the morning
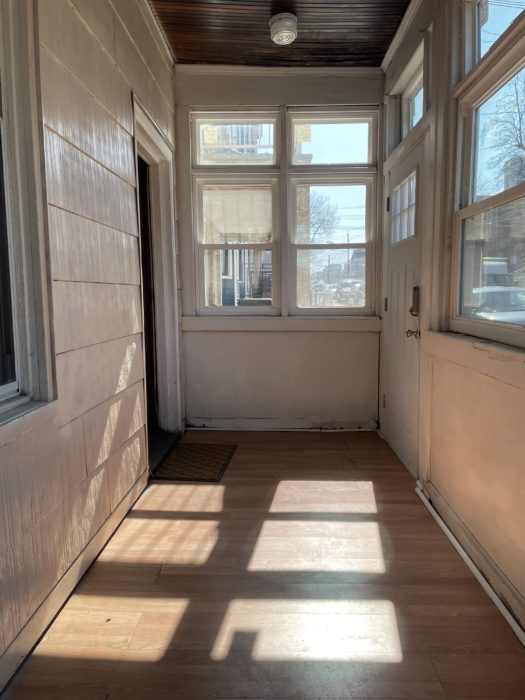
When we finally got the keys, we spent one day in the house and saw how sunlight moved towards the mudroom in the afternoon. We’re now calling it the sunroom.
The mudroom by 3pm and is now called the sunroom
I immediately sketched out a different idea: benches around the space that double up as shoe storage, but also rods above the windowsills so I can hang some plants that would take advantage of the afternoon light.
Photo lifted from Pinterest without credit; sorryPhoto by: Mike Hetu for apartmenttherapy.com
Depending on our budget, I would like to rip up the laminate floor and replace them with Portuguese-inspired tiles to delineate the room from the entryway. The wall could use a repaint and we will find out soon if the windows the seller installed are sufficient enough to keep the cold out.
And this is just a small part of our new-old house. We’re just getting started!
You should get your shit together before you make the biggest investment of your life; and while you’re in the process of making the biggest investment of your life, keep your shit together and tight. Buying a house–no, buying a house with a partner–is not for the faint of heart.
I have owned my apartment for over 10 years now but the knots in my stomach are much tighter this time because we are buying our home together. My anxiety has doubled and it has manifested while I sleep.
In the first dream, I was treading in a cave and I could feel the water gently sloshing up to my face. Alec was in the water with me trying to help me move towards the cave’s opening. I actually don’t remember the second dream, but I abruptly woke and sat up gasping for air because I smelled smoke; but I guess the smell was not real enough to make me check the candles in the living room–I went back to sleep as fast as I woke up.
The real work starts after you’ve created your wishlist and narrowed down your dream home choices. It may be months from the first time you inquire about a house to the day you lock a rate; deals may fall through in between, so it’s important that you stay diligent until you get the keys. Here’s what I learned throughout our home-buying process:
Do your homework – Find reviews of the people you will hire to help you get through the finish line. They’re your real estate agent, your lender, and your lawyer. They all won’t be positive reviews, so let your gut make the final decision. When you first talked to them over the phone, were they pleasant? Did they take the time to answer all of your questions? Did they reply to your emails in a timely manner? When I sent a courtesy email and told a potential lender that we have decided to go with another, they emailed back and bad-mouthed the agent we chose. His true colors showed up and made us more confident about our selection.
Read everything! – You must read every line of a contract before you sign your name. Check misspellings; make sure they have the right social security number; double-check prices and ask about any information that seems unclear. My loyalty to my bank over the years earned me the free help to check a competing bank’s numbers. My bank knew they couldn’t beat the interest rate our lender was offering, so they advised me to go ahead without them. Who knew my bank’s mortgage agent would help me decipher another bank’s contract?
Organize all your paperwork – While you’re still shopping for the perfect home, your lender will continuously ask you to prove that you can afford your future home until you seal the deal. Group all your paperwork by category: bank statements, paystubs, investments, tax forms. Establish a naming convention so you can easily find them and order them by date. Mine was something like FirstNameLastName_BankName_MonthDayYear so that the same types of documents were grouped together but were still identified by our names. And then back everything up in the cloud!
Stay consistent – Until you move in to your new home, do not make any life changes. Do not switch jobs; do not make any big purchases; do not open or close lines of credits; do not get married; do not move money you cannot provide a paper trail to; do not accept money you cannot provide a paper trail to. Even if the Republic Bank of Your Parents gives you money, you will have to prove that it’s a gift. Consistency is the key when all of the institutions’ eyes are on you.
Manage the people – Do not assume that just because you have paid people to help you buy a house that they will do their job and tell you what the next step is. Alec and I had to be on top of everyone throughout the process. I was the person emailing everyone, “What else do you need from us to keep moving forward?” I was reminding our lawyer to contact the seller’s lawyer about contract updates and timely signatures. Our inspector had to be reminded twice before he sent us the oil tank and termite inspection reports he completed a week prior. Throughout our home buying process, we were also passed around from assistants to junior associates because imagine this: we weren’t their only customers! We established good rapport with them because we knew they did the paperwork before their bosses followed up with us.
Manage your time – Whenever we needed to make appointments with contractors and architects, we gave them several time slots in our schedule so they can pick whichever time also worked for them. Our favorite contacts were the ones who sent us links to their calendars and immediately followed up with meeting invites once we all found an agreeable date and time. When contracts needed to be signed, Alec and I set aside time after dinner to read them separately but finalize together. If you are buying a house with someone, this is not the time to be passive.
Divide and conquer – Alec and I shared a specific calendar with house-related dates so we were both aware of deadlines that we needed to meet. We took ownership of different things: I was the one researching contractors and he was the one sleuthing for building plans around the neighborhood we were interested in. While I have been designing my dream kitchen, he has been researching home security options. If I did the research for all the home insurance options, he reviewed them and picked which was best for us. If I wanted to scream-email because I was managing the people, he made sure my draft was polite before I hit send.
We’re almost at the finish line in our home-buying process and I’m aware that more adulting is needed as soon as we close, but that’s for another post.
Whenever we searched “3+ bedrooms, 1+ bath, outdoor space, public transportation” in Jersey City against our budget, results dwindled; it didn’t seem like we would move out of Harlem any time soon. During the day, we would text each other listings we found but nothing seemed to stick.
Jersey City is rich in history and has a lot of old dwellings. If the house was under our budget, it was run down; the thought of renovating scared the shit out of us since we’ve watched too many Grand Designs episodes. If it was newly renovated, we didn’t like the layout or the materials used; we would have to renovate anyway.
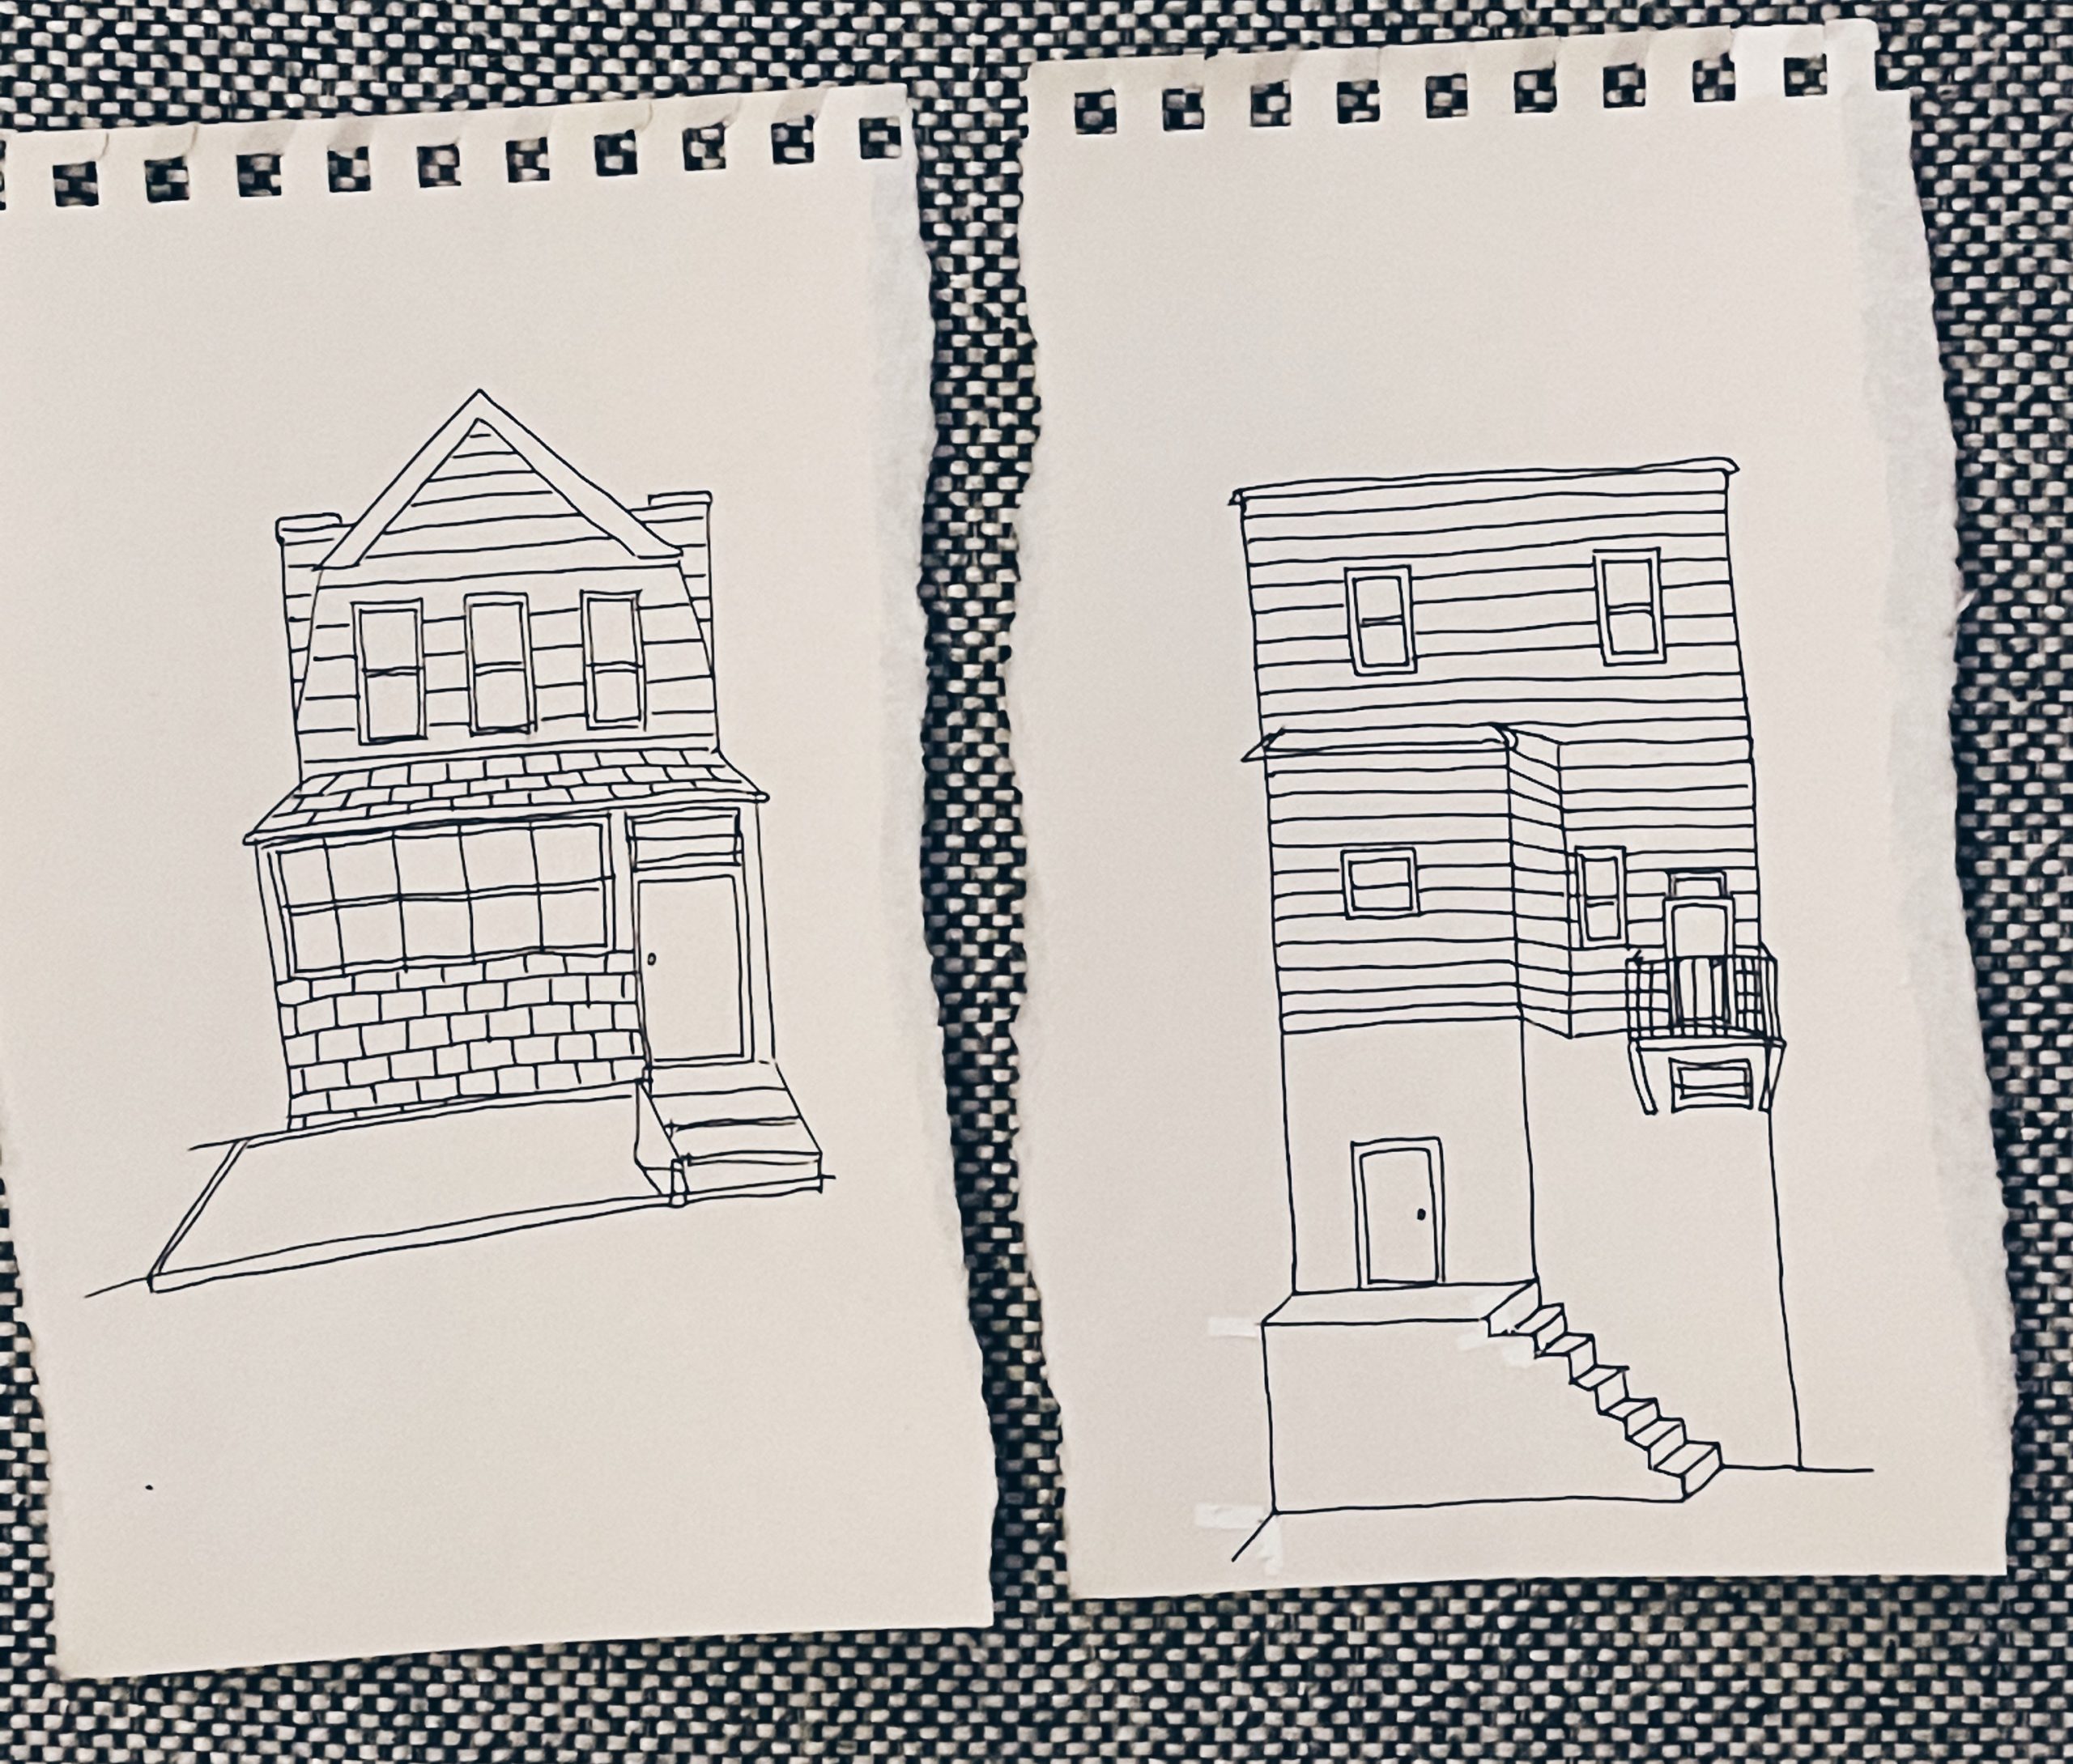
A single-family house that recently dropped in price caught Alec’s eye. It sits on a narrow but deep lot on a quiet street that’s also a block and a half away from the Light Rail. It was the first property that we considered to having potential. It looked like it will require a lot of work–listing and staging photos only fool you so much–but for the first time, our thinking switched from fear to, What if we can build our forever home according to our specs?
Jersey City sketch study
As I wrote in my previous post, the Bergen-Lafayette area is going through a lot of changes. Making an offer on this house means we will bet on the improvements down the line; it will mean making an investment on a neighborhood we’ve only done research on but never spent time in. When Alec and I felt comfortable about the possibilities, we reached out to the agent and scheduled a virtual tour over Zoom with the seller.
We imagined what and how the house could be. We did more homework and interviewed different contractors to talk about our plan and vision. A lot of them were gung-ho to sign up and do the work, but none made me feel as comfortable as Tam of Houseplay Renovations. We signed up for her homebuyer support Zoom service and then scheduled an in-person visit to see the house. She guided us while Alec measured everything she needed and I pointed my phone’s camera wherever she instructed. Afterwards, she was always on-point with scheduling time to talk that worked for all of us. I never had to follow-up–she was always beating me to it. It’s the project manager-kind of thinking that I was able to relate to.
In the meantime, there has been a lot of emails, phone calls, and Zoom meetings with different banks and real estate lawyers. When we were confident enough that we can afford the house and the level of gut renovations it required for us to consider it move-in ready, we got our finances ready and we let our agent know that we were ready to make an offer.
I know we don’t really have the house just yet, but I preemptively started designing my dream kitchen. When I was buying my Harlem apartment, the sales office said I was the only one who requested “an open kitchen”; that most people asked for a park view or a second bathroom first. Now you know where my priorities lie but really, I’ve been dreaming about my perfectly functional kitchen for 10 years!
Alec is the person who made me realize that “we” is a very good thing, but I’m not hesitant to say “my dream kitchen” because my day to day revolves around food. While I’m working, I’m planning ahead so that the right meat has enough time to thaw from the freezer; before starting a workout, I set up the rice cooker so it’s one less thing to think about after; while walking Atticus, I’m trying to decide if I should make a stop at the pizza place; before going to bed, I make sure there’s enough cold brew for tomorrow’s drip. I plan all the grocery shopping and cooking lest I want to eat mac and cheese everyday.
I picked these appliances first because their measurements will dictate the rest of our kitchen. Without thinking of style or prices just yet, I wanted to create a wishlist so that whatever kitchen layout we get, I can plan to work around them:
Induction cooktop like the Bosch 800 series – I have always wanted an induction cooktop for easy cleaning, precise cooking, and for its safety features. If you think, I can’t imagine cooking without an open flame, then you simply haven’t tried cooking on an induction cooktop. The Wirecutter says there are several misconceptions about them. Americans tend to be hesitant to adopt new cooking tech mainly because it hasn’t been marketed very well. Here I am, Bosch, and I am going to make sure I convince people to switch after I get mine installed!
A very wide single basin sink like the Kohler 36″ apron sink – I am the cook that is always cleaning up every step of the way and I always find myself rinsing my chopping block or wrestling with a baking sheet. I never soak dishes, so my priority is a roomy sink over a deep one.
A tall faucet to accommodate a stock pot and to dispense carbonated water like the Grohe Blue chilled and sparkling – I don’t think a pot filler is necessary above the stove, but I can’t stand that my purifier takes up a lot of sink space. I exclusively drink seltzer water at home and at work, so having one faucet that does both would be amazing. Together with the induction cooktop that can heat water in seconds, I won’t be needing my electric kettle to boil a giant pot of water for pasta anymore.
Of course, there is the quiet dishwasher, the counter-deep refrigerator, and the right oven model for someone who doesn’t favor cooking a giant turkey, but the above 3 are the ones that make the top of my list.
And then I made a list of all the things that I do in the kitchen so that I can plan on how to improve each one.
Cooking – an efficient vent would minimize wall and ceiling stains – an easy to reach backsplash would make it easier to wipe down after each use – a self-cleaning stove would be a necessity
Prepping/chopping – ample space for sorting out and bagging groceries for storage – a chopping block that’s not too far away from the sink for easy cleanup – extra space next to the stove for easy transition from prep to cooking
Composting/recycling/garbage disposal – an under the counter large bin to collect compost directly from the chopping block before transporting to an outside composter; I already use bokashi bran to help with my indoor composting – it would be great not to have all our recyclables and trash exposed until we have to take them out for the next day’s collection; this is something we will have to get used to since we will be our own landlords!
Storing – easy to reach and store plates and utensils used everyday – easy access for the most used small appliances and enclosed storage for those that only get used during the holidays – a daily view of fresh food items that don’t need refrigeration like garlic and ginger; if I see them, I will use them! – a hidden paper towel compartment (why is this not a more common thing?!) – vertically stored ladles and serving utensils to easily pick which one to use
Lastly, I audited my current kitchen items, from the heaviest in weight to the least used. This will help me plan how I move around the kitchen and how much storage I need.
Heaviest weight items. I’ve always stored these on lower shelves for a less dangerous lift, but they also can’t be stored lower than my knees: – All Le Creuset pots and pans (I have 5 different sized ones and you know how heavy each one is!) – KitchenAid mixer – Cast iron pan
From most used: – wok – rice cooker – cast iron pan – assorted Le Creusets – donabe clay pot – blender
…to almost never. I would store these farther from reach, but not so far that I will completely forget about them. – steamer – Instant Pot – food processor – waffle maker – hot pot – roasting pan – raclette – ice cream maker – sausage maker attachment – pasta maker attachment
After we’re all vaccinated and we can all see each other again, I’d love to invite you over for some melted raclette with salami and gherkins!
With our wishlist in mind and taking the Heights off the board, we narrowed our search down to the Bergen-Lafayette area where the Light Rail that connects to the PATH train is within walking distance.
A Jersey City map relief on Exchange Place Light Rail platform
A Google search revealed 13 new home developments are either being planned or have already started construction in the neighborhood. Berry Lane Park officially opened in 2016 after 4 years of construction on a brownfield site of former rail yards, junkyards, and industrial facilities. It now includes a 12,000-square foot poured-in-place concrete skate park funded by the Tony Hawk Foundation. Old coal silos still stand in the park and the Jersey City Mural Arts Program is in the process of selecting local artists to create Harriet Tubman- and the Underground Railroad-themed murals to honor the more than 55,000 slaves who crossed through Jersey City to escape slavery.
Canal Crossing is also slated for a controversial residential development and will include a greenway along the former route of the Morris Canal, which moved coal to industrializing eastern cities in the 1800s. We also saw the renderings for a 110-unit mixed-use development on Garfield Avenue.
All the changes remind me of Harlem 15 years ago. For better or worse, more people have a place to call home, small businesses can thrive, and city parks and shared public spaces flourish.
If you told me back in the day that I will be writing about moving to New Jersey after turning 40, I would have made a face and mouthed, Never. Funny how life happens: you meet the person who changes the trajectory you thought you’d already planned for in your head, and you love it.
I was fortunate enough to buy my own place in Harlem, New York when the neighborhood was starting to gentrify 10 years ago. I grew up in Washington Heights, so staying uptown was a no brainer for me. Until my parents retired, home-cooked Filipino meals were a block away. Except for a short stint in 2009 commuting to Connecticut for work, Manhattan has always been home.
Alec and I were hiking in Patagonia, Chile when we started talking about moving in together. We never felt any pressure–things just started to happen. We welcomed 2020 and started consolidating our stuff. We were even able to travel to San Francisco and San Diego in late February, not knowing it was going to be our last trip for a while. When it became obvious that Covid-19 was worse than what anyone has said, we had to act quickly; Alec rented a storage space and carried his essentials to move to Harlem. There was a day when we didn’t even know if he can cross New Jersey from New York; everything was up in the air and things were just getting worse. We already planned on moving in together, but the pandemic just pushed us to do it earlier.
The first lockdown was months long so we felt so grateful to have our own private outdoor space. We carved our own work spaces in the apartment while my 8-year old Rottweiler, Atticus, started to get used to having us both at home. By summer, we started passively looking at house listings–what if we got a bigger space? But we had a very specific wishlist:
1. Must be walking distance to public transportation – Our commute from Harlem to the bottom tip of Manhattan takes us at least 50 minutes due to overcrowding in the subway; anything that’s shorter than that would be a plus 2. Must have safe biking lanes – As cyclists, we would like to ride our bikes when running errands without worrying about vehicular traffic. Unfortunately, the New York City mayor has not kept his promise to make it safe for bike commuters. I have biked from Harlem all the way down to World Trade Center and even though it’s a good workout, crossing Harlem has always been harrowing for me. 3. A neighborhood that supports high-density housing – Neither of us aspire to have a house in the suburbs. We’ve always advocated for city living and higher density so that communities form and thrive. We want to keep an outdoor space to be used for vegetable and flower gardening, composting, and someday a chicken coop, but never just for a green lawn. We would like an attached home to conserve heat, but if it’s a detached house, we’d consider making it passive and as energy-efficient as much as possible.
Looking for a comparable but bigger apartment in Harlem proved to be way out of our budget, even with two salaries. Alec used to live in Hoboken, New Jersey so he was already familiar with the area, but his Hurricane Sandy experience motivated us to find a place less vulnerable to flooding. Alec has also been involved with Bike Hoboken and Bike JC, citizen-based non-profit advocacy organizations that aim to make their city streets safer for bike use, so I started to learn about the Jersey City mayor who has made significant improvements to its cycling infrastructure.
There were plenty of listings in the Heights in Jersey City, but every time I mapped the house, it was always a long walk to the nearest train. Our walk to the subway is less than 10 minutes now and we have 4 lines to choose from to get us downtown; if I was truly to give up New York, everything must be an improvement. I didn’t want to settle–27 years in Manhattan will do that to anyone.
Jammy eggs are my new jam! Ha! Even though they need more supervision than hard-boiled eggs, they’re easier to make than poached eggs. They’re perfect to top your sourdough-avocado toast with or to jazz up your instant ramen.
A spider skimmer is useful here; in fact, it’s one of my most used kitchen tools. If you don’t have one, you really should buy one.
Ingredients:
eggs, room temperature
1. Boil enough water in a small saucepot on high heat to make sure your eggs will be submerged.
2. When water is boiling, adjust the heat to low and gently add the eggs using a spider skimmer.
3. Re-adjust the heat back to high and cook for 6 minutes. No more; no less.
4. Turn off the heat after 6 minutes and scoop the eggs out using the spider skimmer and run them under cold water in the sink until they’re cool enough to handle and peel. Slice in half and serve with your favorite accoutrements.
Related post/s: Buy the most useful kitchen tool ever: a spider skimmer
Baking instructions are weird. This recipe came from Bon Appetit and I had to enlist two of my friends’ help to decipher what the original recipe meant by “Butter pan, then line with 2 overlapping 16×12 sheets of parchment, making sure parchment comes at least 2 inches above top of pan on all sides.”
Why am I buttering the pan and then lining it with parchment paper? Seems like a waste of butter. Oh, I see; the butter will seep through the paper and keep the cheesecake from sticking to the pan–you just don’t want the butter directly in the cheesecake.
What’s up with all the wording to line the pan with paper? I’ve re-worded that bit here to make it more simple, and I think mine is easier to understand especially by beginners like me.
Don’t be tempted to open the oven while you’re baking this cheesecake. You want it to collapse after you’ve baked it, not during. The middle part will give a little while it’s cooling, but that will tell you that it’s indeed jiggly inside.
Ingredients: a small knob of soft unsalted butter 2 lbs cream cheese, room temperature 1 1/2 cups sugar 6 eggs 2 cups heavy cream 1 tsp salt 1 tsp vanilla extract 1/3 cup flour
1. Move oven rack in the middle of the oven and preheat to 400°. Butter the springform pan, then line and pleat with 2 sheets of parchment paper that’s oversized enough to make sure that at least 2 inches come up on the sides of the pan. Then place pan on a rimmed baking sheet. 2. In your stand mixer with a paddle attachment, beat cream cheese and sugar in the bowl on medium-low speed, scraping down sides of bowl, until very smooth and sugar has dissolved, about 2 minutes. 3. Increase the speed to medium and add eggs one at a time, beating each egg 15 seconds before adding the next. Scrape down sides of bowl, then reduce mixer speed to medium-low. Add heavy cream, salt, and vanilla and beat until combined, about 30 seconds. 4. Remove bowl from the mixer and sift flour evenly over cream cheese mixture. Mix with a spatula while scraping down the sides of bowl until the batter is smooth and silky. 5. Pour batter into prepared pan. Bake cheesecake for an hour until golden brown on top but still very jiggly in the center. 6. Remove from oven to let cool slightly then unmold. It will collapse as it cools–that’s okay! Let cool completely. Carefully peel away parchment from sides of cheesecake. Slice into wedges and serve at room temperature.
New York City temperature dropped to “feels like -15F” during the long weekend that I was forced to make this Spanish chorizo and potato stew before hibernating. Actually, “forced” is such a strong word; it was too easy to be forced to make it. It was a hearty meal that did not require much effort.
Ingredients: 6 bacon slices, chopped 1 large sweet onion, chopped 6 garlic cloves, minced, sliced 3 tbsps tomato paste 2 lbs smoked Spanish chorizo, cut into rounds 2 large russet potatoes, peeled, chopped into large chunks 1 lb button mushrooms 32 oz chicken broth 3/4 cup hot smoked Spanish paprika 1/2 tsp cayenne pepper sour cream a handful of dill salt
1. Render bacon fat by heating a large pot over medium heat. Add bacon and cook, stirring occasionally, until beginning to brown but crisp, about 7 minutes. Remove to a plate. 2. Add onions to the same pot with the bacon fat. Cook, stirring often, until softened, about 10 minutes. Add garlic, and cook, stirring, about 3 minutes. Stir in tomato paste and cook until slightly darkened in color. 3. Return bacon to pot, then add the chorizo until slightly browned. Add the potatoes, mushrooms, broth, paprika, and cayenne and bring to a boil. Reduce heat so liquid is at a bare simmer and cook, stirring occasionally, until potatoes are tender, about 30 minutes. Season with salt. 4. Remove from heat. Ladle into small bowls and top with a dollop or two of sour cream and torn dill.