Matcha Marble Cake

For some reason, I was craving a matcha-flavored bread after I joined the Women’s March’s first anniversary with friends. I knew I’ve tried it before but it wasn’t as spongy as I wanted it to be, so that night, I tried to buy a small tub of plain yogurt in my Harlem neighborhood and refill my stash of matcha. My trip was not completely unsuccessful; I could not find either product separately, but weirdly enough I was able to buy a matcha-flavored yogurt. That was for my first try, so I couldn’t make the swirl patterns required in this recipe. I also was too lazy to use my stand mixer to whisk the egg whites. I worked extra hard to whisk by hand and stopped short of getting those peaks. The result is not as spongey as intended, so I tried a second time.

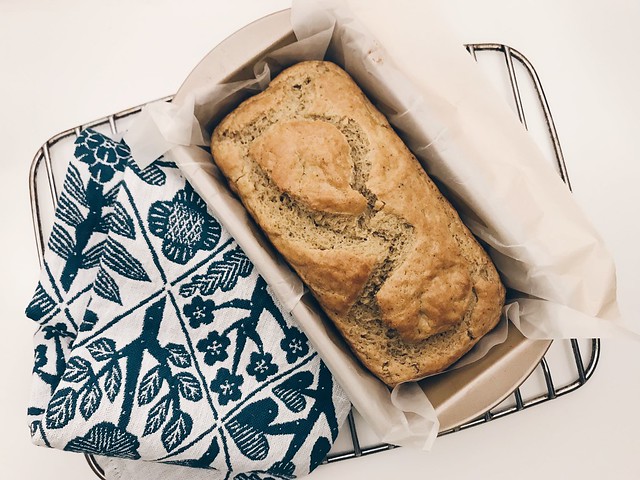
For my second try, I bought everything required downtown and I also reluctantly dusted off my KitchenAid mixer to whisk the egg whites properly. The rice flour made such a huge difference in making this cake fluffy, so I would highly recommend you follow this recipe to a T since I’ve already tested it. You won’t regret it.

Ingredients:
3 eggs, whites and yolks separated
1/4 cup caster sugar
1/2 tbsp honey
1/2 cup corn oil
1 small tub of plain yogurt
1/2 cup cake flour
1/2 cup rice flour
1/2 tbsp matcha powder, mix with 2 tbsps hot water into paste
3 egg whites
1/3 cup sugar

1. Preheat oven to 320º. Grease a loaf pan and line with baking paper at the bottom.
2. In a large bowl, mix egg yolks, caster sugar, and oil together with a hand whisk. Add yogurt and honey and mix well. Sift in plain flour and rice flour, and mix well.
3. Using your KitchenAid mixer, whisk egg whites until frothy, and gradually add in sugar. Continue to whisk egg whites until peaks form. Fold egg whites gently into the yolk mixture in 3 batches until combined.
4. Divide batter into 2 bowls. Add matcha paste into one portion of the batter and gently fold well with a rubber spatula.
5. Spoon plain and matcha batter alternately into prepared loaf pan. Gently shake the loaf pan a little and use a skewer inserted into the batter to create swirl patterns.
6. Bake for about 30-35 minutes. Leave cake in pan till completely cool before slicing.

Related post/s:
My first try baking with matcha

Farro and White Bean Tomato Soup

It’s been almost two years since I’ve updated this site. I’ve been see-sawing about keeping it up again, mainly because of time commitment. In the past 2 years, I’ve learned how to unplug and take more naps, and I’m just not sure if I want to go back to having multiple personal projects again because taking time for myself and doing almost nothing have been glorious. I’m active on Instagram as @ext212 but lately, I’ve been wanting to write again, even if it’s just finessing a recipe I’ve tested. So let’s just say that maybeee I can ease my way back to writing here again but without being tied to a regular schedule?

To start again, I wanted to test this recipe from Mark Bittman when the weather got cold again this season. I thought it would be a comforting bowl even if there isn’t any meat involved and I was right. I went for the shortcuts though, using canned beans in water instead of dried, and using a can of chopped tomatoes rather than fresh ones to save time. I gather that this version is not as hearty as originally intended, but a couple of bowls for dinner made me pretty warm inside.

Ingredients:
1 cup farro
1 can of white beans, rinsed, drained
1 large can of chopped tomatoes with its juice
chicken stock
1 onion, sliced
2 celery stalks, chopped
2 carrots, chopped
3 cloves garlic, minced
a handful parsley, roughly chopped
Parmesan cheese, grated
oil, salt, pepper

1. Put oil in a large Dutch oven over medium heat. Sauté garlic until golden. Add the onions until translucent. Add the celery and carrots with some salt and pepper and cook until onions have softened.
2. Add farro, the beans, the tomatoes, and the stock. Mix well.
3. Bring to a boil, then adjust heat to a steady simmer. Cook until farro is tender, at least 15 minutes, adding stock as necessary if mixture becomes too thick. Stir in parsley, mix, then cook another 5 minutes. Taste and adjust seasoning, then serve with lots of Parmesan.

Spice Turmeric and Lemon BBQ Chicken

This is a Jamie Oliver recipe that requires you to spatchcock your chicken, but I decided to keep it whole and do less work. This increases the cooking time in the oven, so I just made sure the chicken fit snugly in my deep cast iron pan so that I could easily transfer it from the oven to my stovetop to finish. If you are using a regular roasting tray, transfer the chicken to an already-heated frying pan, deep enough to hold it and its juices.

I marinated the chicken a day just to make sure the flavor set in. If you only have a few hours to do so, try this with smaller chicken pieces. I carved the chicken and served it with some greens and leftover roasted butternut squash.

Ingredients:
1 whole chicken, rinsed, pat dry with paper towel
1 stick of butter
2 cloves of garlic, chopped
a knob of ginger, chopped
1 tsp turmeric, ground
1/4 tsp cinnamon, ground
1 lemon, zest separated
a handful of cilantro, leaves separated from the stems, roughly chopped
olive oil
3 tbsps honey
4 scallions, chopped
1 fresh green chile, chopped

1. Make the marinade. Melt the butter in a small pan. In a blender, pulse together the garlic, ginger, turmeric, cinnamon, cilantro stalks, and lemon zest. Squeeze in the juice from half the lemon. Season with salt and pepper and pour in the butter with a tbsp of oil. Keep blitzing until a bit pasty while adding more oil if it’s a little too thick.
2. Rub this marinade all over the chicken, working it into all the nooks and crannies. If you are marinating in advance, cover the chicken and pop it in the fridge until needed.
3. When you’re ready to cook the chicken, preheat your oven to 375º. Place the chicken in a deep-enough snug-fitting cast iron pan and spoon over any marinade that may have fallen off. Cover the tray tightly with foil and roast in the oven for 1 hour and 10 minutes. The chicken should be cooked through. Check by piercing the thigh with a sharp knife. If the juice that runs out is clear, you’re okay.
4. While the chicken is cooking, toss together in a bowl the scallions, chile, and cilantro leaves with the remaining lemon juice. Set aside.
5. Carefully transfer the chicken from the oven to the stovetop on medium heat. Baste it with any juice from the tray and drizzle it all over with the honey. Cook until the chicken skin is golden. Serve the chicken with the scallion garnish.

Shrimp on Couscous and Summer Vegetables

This is from Jamie Oliver’s Everyday Super Food with a few adjustments. If you’re out of luck and need to use frozen and cooked shrimp, make sure they are completely thawed and dried with paper towels before you mix them in with the marinade. (I’m sorry, by the way.) Leave them soaking longer so that the flavor penetrates.

Ingredients:
2 sprigs of fresh rosemary, stripped
2 cloves of garlic, peeled
olive oil
1 tsp smoked paprika
1 good pinch of saffron
1 lb shrimp, deveined, peeled, tail-on
1 orange
1/2 cup couscous
1/4 cup peas
half a bunch of asparagus
1 zucchini, chopped
2 scallions, chopped
1 yellow bell pepper, chopped
1 red bell pepper, chopped
1 fresh red chile, seeded, chopped
3 fresh mint leaves, julienned
juice of 1 lemon
2 tbsp plain yogurt
salt, pepper

1. Using a mortar, pound the rosemary leaves and the garlic into a paste with a pinch of salt. Muddle in 1 tbsp of oil, the paprika, saffron and a swig of boiling water to make a marinade. Cut the orange in half and toss one half with the shrimp and the marinade. Mix well and set aside until almost ready to serve.
2. Put all the vegetables in a serving bowl with the lemon juice and the other half of the orange. Season with salt and pepper. Mix well and set aside.
3. Put the couscous into a bowl and just cover with boiling water, then pop a plate on top and leave to fluff up. Uncover after a 3 minutes and toss with the vegetables.
4. Put a large non-stick frying pan on a high heat. Add the shrimp, marinade, and orange wedges and cook for up to 5 minutes, or until the shrimp are browned, then arrange on top of the couscous and vegetables. Top with yogurt.

Cauliflower Pizza

There’s several cauliflower pizza recipes out there, but my version doesn’t use tomato sauce because I don’t want my pizza to be soggy. Using one egg binds the ground cauliflower, but not so much that you can actually fold it and eat it like a pizza–you’ll still need a fork to eat this, and perhaps a spoon to scoop everything together.

What I like about this recipe is how you can play with different toppings. Sure you can use mozzarella instead of Parmesan, but I wanted a hardy cheese that won’t get soupy. I had extra Gruyere in the fridge and so I decided to grate that over the rest of the toppings. Arugula leftovers? Sure! You can also leave this as a vegetarian dish and skip the pepperoni, but where’s the fun in that?

Ingredients:
1 head of cauliflower, chopped in smaller pieces
1 large egg, lightly beaten
a nice block of Parmesan cheese, grated
salt, pepper
non-stick spray
a smaller block of Gruyere cheese
2 tomatoes, sliced
a handful of basil leaves, torn
a handful of arugula
pepperoni
oil

1. Preheat oven to 425º and line a baking sheet with parchment paper.
2. Using a food processor, quickly blitz cauliflower florets. Do it in 2 separate batches if necessary. Transfer to a large mixing bowl.
3. Combine ground cauliflower with the egg, Parmesan cheese, and season with salt and pepper. Lightly mix with a spatula.
4. Spray the lined baking sheet with non-stick spray and pat the cauliflower mix flat onto it like a rectangular pizza. Spread evenly with the spatula.
5. Grate the Gruyere over it and top with the rest of the ingredients. Drizzle some oil and bake for up to 18 minutes, or until golden on the edges.