Jiggly Cheesecake

Baking instructions are weird. This recipe came from Bon Appetit and I had to enlist two of my friends’ help to decipher what the original recipe meant by “Butter pan, then line with 2 overlapping 16×12 sheets of parchment, making sure parchment comes at least 2 inches above top of pan on all sides.”
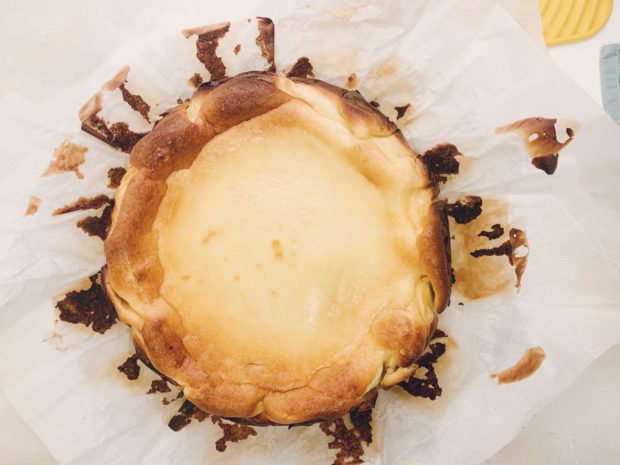
Why am I buttering the pan and then lining it with parchment paper? Seems like a waste of butter. Oh, I see; the butter will seep through the paper and keep the cheesecake from sticking to the pan–you just don’t want the butter directly in the cheesecake.
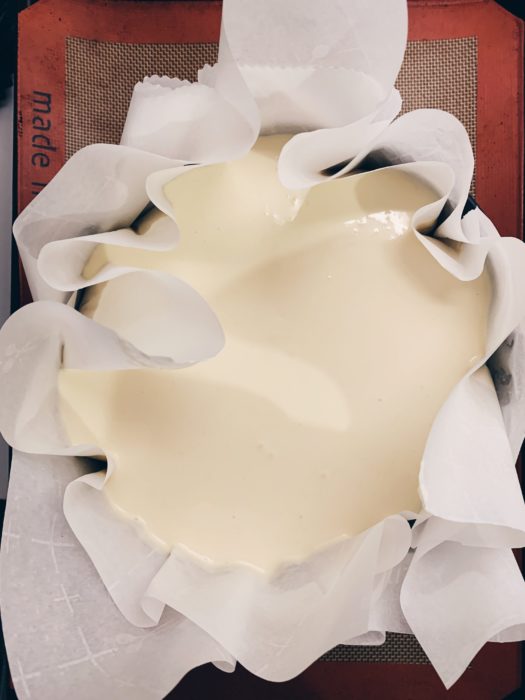
What’s up with all the wording to line the pan with paper? I’ve re-worded that bit here to make it more simple, and I think mine is easier to understand especially by beginners like me.
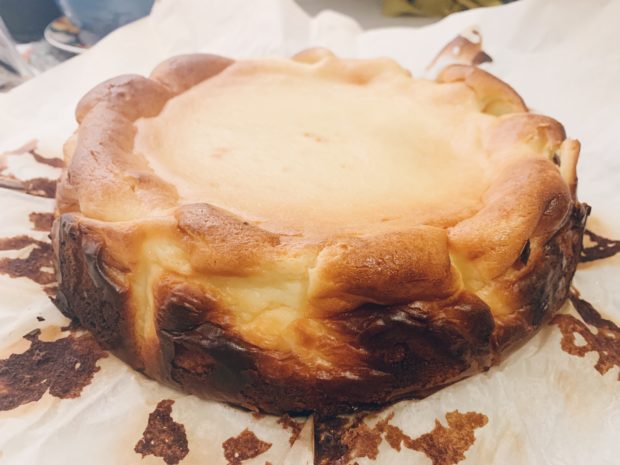
Don’t be tempted to open the oven while you’re baking this cheesecake. You want it to collapse after you’ve baked it, not during. The middle part will give a little while it’s cooling, but that will tell you that it’s indeed jiggly inside.

Ingredients:
a small knob of soft unsalted butter
2 lbs cream cheese, room temperature
1 1/2 cups sugar
6 eggs
2 cups heavy cream
1 tsp salt
1 tsp vanilla extract
1/3 cup flour

1. Move oven rack in the middle of the oven and preheat to 400°. Butter the springform pan, then line and pleat with 2 sheets of parchment paper that’s oversized enough to make sure that at least 2 inches come up on the sides of the pan. Then place pan on a rimmed baking sheet.
2. In your stand mixer with a paddle attachment, beat cream cheese and sugar in the bowl on medium-low speed, scraping down sides of bowl, until very smooth and sugar has dissolved, about 2 minutes.
3. Increase the speed to medium and add eggs one at a time, beating each egg 15 seconds before adding the next. Scrape down sides of bowl, then reduce mixer speed to medium-low. Add heavy cream, salt, and vanilla and beat until combined, about 30 seconds.
4. Remove bowl from the mixer and sift flour evenly over cream cheese mixture. Mix with a spatula while scraping down the sides of bowl until the batter is smooth and silky.
5. Pour batter into prepared pan. Bake cheesecake for an hour until golden brown on top but still very jiggly in the center.
6. Remove from oven to let cool slightly then unmold. It will collapse as it cools–that’s okay! Let cool completely. Carefully peel away parchment from sides of cheesecake. Slice into wedges and serve at room temperature.

Related post/s:
You will need a 10-inch diameter non-stick springform pan for this
Some parchment paper is also necessary

Mandarin-Almond Flour Cake

I can’t even begin to tell you how much citrus-flavored pancakes I’ve been eating in the last few months. It might be the long-awaited spring weather, but all I’ve been wanting is that tangy taste with my fluffy carbs. On Mother’s Day, I had an incredible pistachio almond cake that was also gluten-free; I couldn’t believe how far gluten-free choices have come. I was inspired to do something similar for my niece’s 8th birthday, but with that subtle citrus taste.

Did you know that tangerines belong in the mandarin sub-group? Therefore, all tangerines are classified as a type of mandarin orange, but not all mandarin oranges are tangerines. Got that? The tangerines in the supermarket were a little too wrinkled for my taste, so I opted for a bag of mandarins instead. Their peel is smoother and tighter and lends to easier zesting.

And that’s really the only work you’ll do here. Once you zest all your mandarins and lemon, everything else is a matter of using your mixer and getting everything throughly combined. I burned mine a bit at 50 minutes, so I’m reducing the time here to 40. Feel free to add sliced blanched almonds to your batter. I had them on hand, but totally forgot to use them!

Ingredients:
5 mandarins, throughly washed and wiped dry
1 lemon, throughly washed and wiped dry
4 eggs
1 cup sugar
3 cups almond flour
1 tsp baking powder
1 small knob of butter, room temperature
confectioner’s sugar for dusting

1. Using a fine grater, grate all the mandarins for their zest. Do the same for the lemon. Set aside.
2. Using an electric mixer, beat the eggs and sugar until light and creamy. Fold in the almond meal, both zests, baking powder. Mix until well combined.
3. Coat the bottom and sides of a 9″ spring form pan. Pour the batter and try to even out with a spatula.
4. Preheat oven at 350º. Bake for 40 minutes, or until lightly golden and a toothpick inserted in the center comes out clean. If the cake is browning too fast, cover loosely with a sheet of foil. Cool on a rack for 10 minutes, then remove from the pan to finish cooling. Dust with confectioner’s sugar.

Related post/s:
The Microplane Classic Zester and Grater is one of my most used tools in my kitchen

Matcha Marble Cake

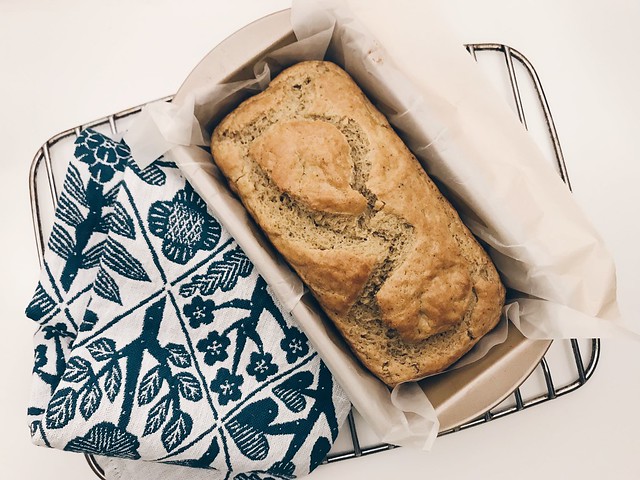
For some reason, I was craving a matcha-flavored bread after I joined the Women’s March’s first anniversary with friends. I knew I’ve tried it before but it wasn’t as spongy as I wanted it to be, so that night, I tried to buy a small tub of plain yogurt in my Harlem neighborhood and refill my stash of matcha. My trip was not completely unsuccessful; I could not find either product separately, but weirdly enough I was able to buy a matcha-flavored yogurt. That was for my first try, so I couldn’t make the swirl patterns required in this recipe. I also was too lazy to use my stand mixer to whisk the egg whites. I worked extra hard to whisk by hand and stopped short of getting those peaks. The result is not as spongey as intended, so I tried a second time.

For my second try, I bought everything required downtown and I also reluctantly dusted off my KitchenAid mixer to whisk the egg whites properly. The rice flour made such a huge difference in making this cake fluffy, so I would highly recommend you follow this recipe to a T since I’ve already tested it. You won’t regret it.

Ingredients:
3 eggs, whites and yolks separated
1/4 cup caster sugar
1/2 tbsp honey
1/2 cup corn oil
1 small tub of plain yogurt
1/2 cup cake flour
1/2 cup rice flour
1/2 tbsp matcha powder, mix with 2 tbsps hot water into paste
3 egg whites
1/3 cup sugar

1. Preheat oven to 320º. Grease a loaf pan and line with baking paper at the bottom.
2. In a large bowl, mix egg yolks, caster sugar, and oil together with a hand whisk. Add yogurt and honey and mix well. Sift in plain flour and rice flour, and mix well.
3. Using your KitchenAid mixer, whisk egg whites until frothy, and gradually add in sugar. Continue to whisk egg whites until peaks form. Fold egg whites gently into the yolk mixture in 3 batches until combined.
4. Divide batter into 2 bowls. Add matcha paste into one portion of the batter and gently fold well with a rubber spatula.
5. Spoon plain and matcha batter alternately into prepared loaf pan. Gently shake the loaf pan a little and use a skewer inserted into the batter to create swirl patterns.
6. Bake for about 30-35 minutes. Leave cake in pan till completely cool before slicing.

Related post/s:
My first try baking with matcha

Cauliflower Pizza

There’s several cauliflower pizza recipes out there, but my version doesn’t use tomato sauce because I don’t want my pizza to be soggy. Using one egg binds the ground cauliflower, but not so much that you can actually fold it and eat it like a pizza–you’ll still need a fork to eat this, and perhaps a spoon to scoop everything together.

What I like about this recipe is how you can play with different toppings. Sure you can use mozzarella instead of Parmesan, but I wanted a hardy cheese that won’t get soupy. I had extra Gruyere in the fridge and so I decided to grate that over the rest of the toppings. Arugula leftovers? Sure! You can also leave this as a vegetarian dish and skip the pepperoni, but where’s the fun in that?

Ingredients:
1 head of cauliflower, chopped in smaller pieces
1 large egg, lightly beaten
a nice block of Parmesan cheese, grated
salt, pepper
non-stick spray
a smaller block of Gruyere cheese
2 tomatoes, sliced
a handful of basil leaves, torn
a handful of arugula
pepperoni
oil

1. Preheat oven to 425º and line a baking sheet with parchment paper.
2. Using a food processor, quickly blitz cauliflower florets. Do it in 2 separate batches if necessary. Transfer to a large mixing bowl.
3. Combine ground cauliflower with the egg, Parmesan cheese, and season with salt and pepper. Lightly mix with a spatula.
4. Spray the lined baking sheet with non-stick spray and pat the cauliflower mix flat onto it like a rectangular pizza. Spread evenly with the spatula.
5. Grate the Gruyere over it and top with the rest of the ingredients. Drizzle some oil and bake for up to 18 minutes, or until golden on the edges.

Ham, Cheese, and Leek Scones

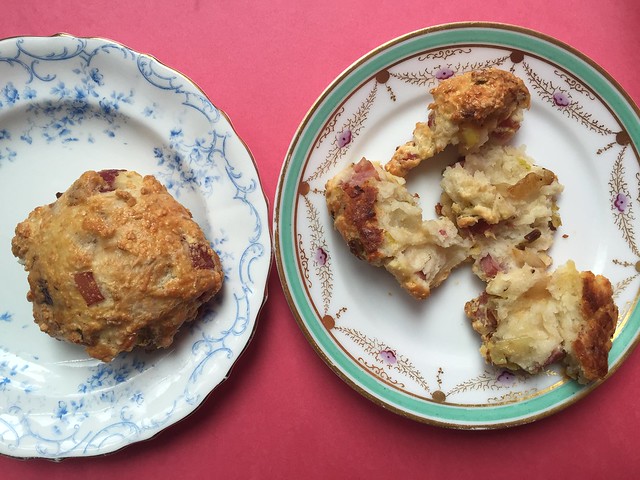
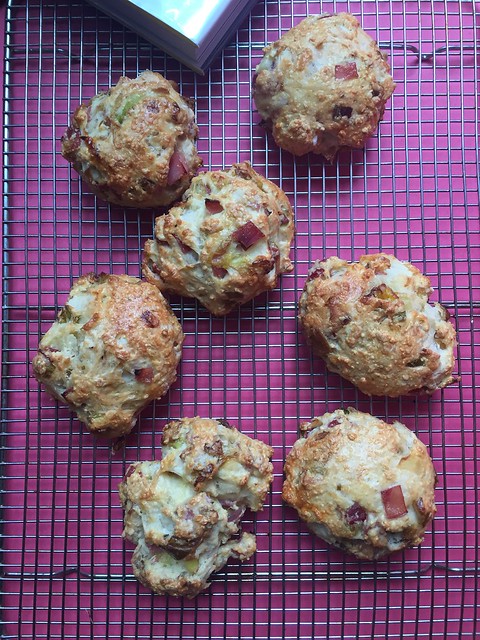
My latest favorite cookbook is Violet Bakery’s by Claire Ptak. I feel like most cookbooks are all the same these days. They use the same photo style with the filtered-look and the same minimalist design throughout. So before I pick up a copy of any cookbook these days, I skim through the pages and see if there’s even a recipe I would like to try at home either because it looks easy enough to test (in the case of baked goods) or if it’s interesting enough to bother. Otherwise, you can just Google everything, right?

Claire Ptak’s recipe for these savory scones was one of those that made me salivate. I needed my friend Lisa’s help understanding some of the baking terms though. What the hell does it mean to cut the butter? She found my question amusing enough that she made a video with her iPhone of her holding two knives and making scissor-like motions with them upright–basically “cutting through” the butter. Now, I know that’s what bakers do and the term wouldn’t have elicited any reaction from baking pros, but to me, it just didn’t make sense. Why not just say mix the butter in with the flour and use the back of a fork to combine and make it crumbly? I changed that step below, so sue me! I also converted the measurements to plain ol’ American English so you don’t have to. Lastly, I only used cooked ham here from the meat counter at my supermarket, but feel free to use good quality prosciutto.

Ingredients:
2 leeks, trimmed, rinsed, sliced into small pieces
2 tbsp unsalted butter
2 tbsp olive oil
salt, pepper
2 cups parmesan cheese, grated
2 1/4 cups of flour, plus more for your work surface
2 tbsp baking powder
1 stick of unsalted butter, cut into cubes
2 cups plain yogurt
2 cups of cooked ham, cut into bite-sized pieces
1 egg, lightly beaten with a little milk or water, for the egg wash

1. In a large skillet over medium-low heat, heat the smaller knob of butter and the oil until the butter starts to foam. Add the leeks and sauté for about 10-15 minutes until soft. Season with salt and pepper. When they are cooked, transfer to a bowl and chill in the fridge until ready to use.
2. In a medium bowl, combine and stir the parmesan, flour, and baking powder. Add and mix in the stick of butter with the back of a fork until crumbly. Add the yogurt, ham, and chilled leeks. Season with salt. Mix to combine and then form a cube and place on your lightly floured surface.
3. Pat the dough into a thick log and cut out scone triangles, about 12 of them. Line a baking sheet that can fit into your fridge with parchment paper. Place the scone on the sheet and chill to set, about 1 hour.
4. Preheat the oven to 350º. When ready to bake, line a different large baking tray with parchment paper, place the chilled scones on it and brush the scones with the egg wash. Bake for 25-30 minutes until golden.

Recommendations:
The Violet Bakery Cookbook is very pretty and practical at once.