Easy Cocoa Brownies with Salt

Wow. I’m not the biggest dessert fan, but wow. I saw the photo of this recipe with the rock salt on top and I was immediately tempted to make it. Shauna was coming over with a bottle of wine to catch up, so I thought why not make dinner for the both of us while she made dessert?

Ingredients:
10 tbsps, or 1 1/4 stick, unsalted butter, sliced in small pieces
1 1/4 cup sugar
3/4 cups plus 2 tbsps unsweetened cocoa powder
1/4 tsp salt
1/2 tsp vanilla extract
2 cold large eggs
1/2 cup all-purpose flour
rock salt

1. Position the oven rack in the lower third of the oven and preheat the oven to 325º Line the bottom and sides of an 8-inch square baking pan with parchment paper, leaving an overhang on two opposite sides. Set aside.
2. Simmer some water in a deep-enough and wide skillet. Combine the butter, sugar, cocoa, and salt in a medium heatproof bowl and set the bowl in the skillet when the water starts to simmer. Stir from time to time with a heatproof spatula until the butter is melted and the mixture is smooth and hot enough that you want to remove your finger fairly quickly after dipping it in to test.
3. Remove the bowl from the skillet and set aside briefly until the mixture is only warm, not hot. Stir in the vanilla. Add the eggs one at a time, stirring vigorously after each one. When the batter looks thick, shiny, and well blended, add the flour and stir until you cannot see it any longer, then beat vigorously for 40 strokes with the spatula.
4. Spread evenly in the lined pan. Bake until a toothpick plunged into the center emerges slightly moist with batter, 20 to 25 minutes. Let cool completely on a rack. Lift up the ends of the parchment, and transfer the brownies to a cutting board. Sprinkle with rock salt and cut into squares.

Related post/s:
Bittersweet: Recipes and Tales from a Life in Chocolate on Amazon

Recommended tool/s:
The Spatula by GIR (Gear that Gets it Right)

Green Tea Afternoon Cake

This is the non-baker’s version of green tea layer cake. The original recipe called for two extra steps to make frosting, but I didn’t want to buy all those extra ingredients to make this sweeter than I really wanted it to be. I wanted this cake to be more like an afternoon snack–with hot tea–rather than a dessert.

I didn’t have cake flour, so I texted Haewon from purplepops to ask what would make an okay substitute. When I got home from the store, I measured exactly 1 cup of all-purpose flour, flattened the top, removed exactly 2 tbsps from it, then replaced it with 2 tbsps of cornstarch.

I had to read about this substitute to understand how and why it would work. According to Harold McGee’s On Food and Cooking, cake flour has been treated and “strongly bleached” with chlorine gas. This causes the starch granules to absorb water and swell more readily to disperse the fat more evenly. This invention “allowed U.S. food manufacturers to develop ‘high-ratio’ packaged cake mixes, in which the sugar can outweigh the flour by as much as 40%.” The cornstarch replacement restrains the formation of gluten and avoids the cake from being tough and chewy.

I did notice that this cake is lighter, more velvety and more em-oh-eye-es-tee, even though I initially thought it was because of the yogurt. So maybe there is a case to buying my own package of cake flour after all, or at the least, substituting it the frugal–but exact–way.

Speaking of substitutes, I used the Maeda-en brand of green tea powder I bought from my local Japanese store. I gather you can open green tea bags and use those, too, or finely ground the dried green tea leaves you already have. I know I’ll be doing just that when I try the earl grey version of this cake.

This recipe made 2 small loaf pans and 3 minis. The one you see in the photograph above is a ceramic loaf pan that’s a mere 4 inches on the longer end: really cute. The small pan took about 40 minutes to bake, while the minis I put in for 30. It goes without saying that they’re great with a cup of hot green tea on a dreary afternoon.

Ingredients:
1 cup all-purpose flour
1 cup cake flour
1 teaspoon baking soda
1 teaspoon salt
4 teaspoons powdered green tea
1 1/4 cups white sugar
1 cup vegetable oil
3 eggs
1 cup plain yogurt
1 1/2 teaspoons vanilla extract

1. Preheat oven to 350º. Grease the loaf pans.
2. Sift together the all-purpose flour, cake flour (or substitute), baking soda, salt, and green tea powder. Set aside.
3. Using your electric mixer, beat together sugar, oil, and eggs until smooth. Stir in vanilla. Beat in the flour mixture alternately with the yogurt, mixing just until incorporated. Pour batter into prepared loaf pans.
4. Bake in the oven for 30 to 40 minutes, or until a toothpick inserted into the center of the cake comes out clean. Cool on wire racks before slicing to serve.

Recommended tool/s:
Purplepops for mad inspiration
Harold McGee’s On Food and Cooking
Amazon.com also carries the Maeda-en green tea powder I used

Lemon-Ricotta Muffins

The last few times I watched Lisa bake, I was in awe at how easily she had a dozen muffins and a pie done. I realized that it was the KitchenAid mixer that helped her move faster; I don’t know why I always insist on mixing batter by hand! I guess to me doing it without the machine left me with less utensils to wash, but now I know better. I also learned how to be patient and leave the oven alone until the baked goods rose; this helped them keep their intended shapes. Now I know why mine always collapsed in the middle! I’ve always been from the school of poking while cooking when it comes to meat, but now I know you’re not supposed to do that while baking.

I was determined to work like she did the next time I tried baking at home. When that chance came up, I looked for a muffin recipe that used ricotta cheese because I had a pint of it left after I made my own ricotta-filled raviolis. I just needed two lemons to complete the recipe below.

I highly recommend the Microplane Premium Classic zester (mine comes in a pretty turquoise handle) to make some very fine lemon zest. You see a gadget like it in the store and you immediately think, Who really needs that much zest that another tool had to be invented for it? It turns out there’s a huge difference from finely-chopping lemon peel to using a sharp zester. Again, negative points to trying to do things by hand.

My only regret is not adding slivers of fresh strawberries or almonds on top to give it a prettier presentation. Next time I will, now that I know muffins are so much easier to make with the right tools.

Ingredients:
2 cups flour
1/2 tsp baking powder
1/2 tsp baking soda
1/2 tsp salt
1 cup plus 1 tsp sugar
1 stick unsalted butter, room temperature
finely grated lemon zest from 2 lemons
1 cup whole-milk ricotta cheese
1 large egg
1 tbsp fresh lemon juice
1/2 tsp almond extract

1. Whisk the flour, baking powder, baking soda, and salt in a medium bowl to blend. Using an electric mixer, beat 1 cup sugar, butter, and lemon zest in a large bowl until light and fluffy.
2. Beat in the ricotta. Beat in the egg, lemon juice, and almond extract. The batter should be thick and fluffy.
3. Line 12 muffin cups with paper liners. Preheat the oven to 350º. Divide the batter and fill each prepared muffin cup halfway. Bake until the muffins just become a tad golden on top, about 20 minutes.

Recommended tool/s:
Microplane Premium Classic Zester

Lemon Upside-Down Loaf

There was a point in time when I “Liked” Food & Wine Magazine on Facebook; I don’t remember when, but I’ve been noticing their updates on my feed lately. A recipe for a lemon upside-down cake contributed by a certain Cal Peternell accompanied a cool-looking photo, and a stamp of approval that indicated it was tested and perfected by the publication’s staff made it even more attractive. I’m such a sucker.

For Easter weekend, after planting the season’s seeds out in my patio and getting slapped by birch tree leaves in a Russian banya, I decided to bake it. I got home past 10pm, but I was still wired from the different temperatures of water I was subjected to at the bathhouse that I decided to play in the kitchen to wind down.

Of course, I don’t own a cake pan; a loaf pan had to do. I just had to adjust the time of cooking and go by the toothpick trick, which I still haven’t gotten used to, by the way. (50 minutes at 350º and another 20 at 325º.) Every time I try to bake, I am tempted to slice whatever I’m baking to see if it’s cooked inside. I don’t have the touch, you see. I can press down on a piece of beef and know immediately if it’s perfectly cooked inside, but I can’t seem to get used to baked goods. It’s a matter of trial and error for me, so I’m going to keep trying. I’m also happy to report that I beat my first egg whites until they formed “stiff peaks”–I finally understood what they mean when they say that! It was very cool to see the egg whites transform from clear to white foam. The arm workout was worth it! And lastly, I think I am starting to fall in-love with my KitchenAid mixer. I’m still in awe at how easy mixing is now!

By the way, I cut the brown and white sugar measurements here because, as you know, I don’t have the sweet tooth. You might want to keep the original 3/4 cup- and 1 cup-measurements, respectively, if you want to stay sweet and true. It is Easter weekend after all.

Ingredients:
1 1/2 sticks unsalted butter, softened
1/4 cup plus 2 tablespoons light brown sugar
1 lemon, very thinly sliced crosswise, seeded
1 1/2 cups all-purpose flour
2 tsps baking powder
1/4 tsp salt
1/2 cup sugar
1 tsp pure vanilla extract
2 large eggs, separated
3/4 cup whole milk
1/4 tsp cream of tartar

1. Preheat the oven to 350º. Set your loaf pan over moderate heat. Add 4 tbsps of the butter to melt. Stir in the brown sugar until dissolved, about 1 minute. Remove from the heat. Arrange the lemon slices in the melted brown sugar. Set aside.
2. In a medium bowl, whisk the flour with the baking powder and salt. Set aside.
3. Using an electric mixer, beat the remaining 8 tbsps of butter with the sugar in the bowl until light and fluffy. Beat in the vanilla and the egg yolks, one at a time. At low speed, beat in the dry ingredients in 3 batches, alternating with the milk.
4. In a stainless steel bowl, beat the egg whites with the cream of tartar until stiff peaks form. Fold one-third of the beaten whites into the batter, then fold in the rest. Mix well. Scrape the batter into the prepared loaf pan and bake for about 50 minutes at 350º, or until a toothpick inserted in the center of the cake comes out clean. Let cool in the pan for 15 minutes, then invert it onto a plate.

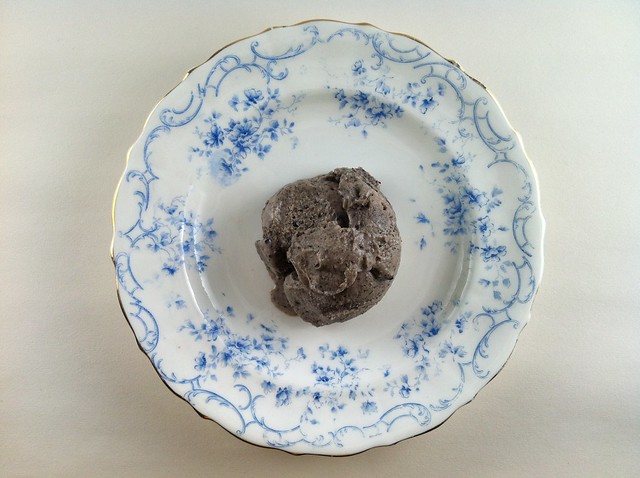
Goma, Japanese Black Sesame Ice Cream

I’m more of a savory dessert fan rather than sweet, and one of my favorites is black sesame ice cream especially after a Japanese dinner. (Green tea and earl gray flavors are included in that list.) The best black sesame I’ve had is from il laboratorio del gelato in Manhattan’s East Village, followed by whatever brand they serve at Sushiden or Sobaya.

When the time came to prepare for my Thanksgiving feast this year, I set aside a couple of hours to replicate this black sesame ice cream recipe, not as part of my menu, but as a test since I was already spending a long time in the kitchen all weekend. The original recipe noted that it was for 1.5L. I assumed that L was for liters, or about 6 cups, which was a little too much for an ice cream flavor I just wanted to test, so I cut everything in half. The problem is that I finished with an amazing ice cream that wasn’t even half a pint! So what could that L had stood for? I should have just gone for the original measurements. Listed below is the version I made–try it first, or double everything for a pint’s worth.

Ingredients:
3 tbsps black sesame seeds
1/2 cup sugar
1 egg yolk
1/4 cup, plus 2 tbsps of whole milk
1/4 cup heavy cream

1. Roast the black sesame seeds in a skillet using medium heat. Move the skillet fast and frequently to avoid burning until you can smell the roasting aroma; no more than a minute. Remove from heat. Separate a tsp’s worth for use later in the recipe if you want more texture in your ice cream. Transfer the rest to a mortar and ground with a pestle.
2. Combine the ground black sesame with half of the sugar in a bowl. Set aside. In another large bowl, whisk the remaining sugar with the egg yolk until the mixture becomes smooth and is a pale yellow color.
3. Heat the milk in a small sauce pan using medium low heat until the edges just start to bubble. Remove the milk from the heat and slowly add the milk to the sugar and yolk mixture while stirring to ensure the eggs don’t cook.
4. Make your custard base. Pour the sugar-yolk-milk mixture back into the sauce pan and heat over medium low heat. Make sure you stir constantly as the mixture thickens or else you will get lumps. Once the mixture coats the back of a wooden spoon–I spent about 20 minutes–immediately remove from the heat. Pour into another bowl using a fine mesh or strainer.
5. Prepare an ice bath. Set aside. Slowly mix the custard in with the black sesame dry mixture. Make sure you add the custard slowly and in small portions or the mixture will separate. Put this bowl in the ice bath to cool while making sure none of the water gets into the custard. When cool, add the heavy cream. If you want your ice cream to have more texture, add the remaining tsp of roasted black sesame seeds as well. Mix well with a rubber spatula.
6. Using your ice cream maker, churn the black sesame custard for about 35 minutes, or until it reaches your desired consistency. Transfer to an air tight plastic container.

Thanks to Michele for my beautiful vintage plate!

Related post/s:
Sage Ice Cream recipe
My first ever foray into baking was for rhubarb crisp