Almond Financiers with Orange Zest

It was like my personal heaven walking in JB Prince, the service and bakeware store on 31st Street between Madison and Park Avenues. It’s been on my list to stop by but I have been unable to until this week because they’re only open on weekdays from 9 to 5. Their Web site sucks so I didn’t expect much from the store, but it was immaculate when I walked in. I touched everything I could touch, especially the Fat Duck and the El Bulli books. The sous vide machines were all lined up in a row and baking sheets and pans of all sizes hanged by clips. Just seeing the individual serving pieces made of plastic and bamboo made me want to throw a huge amuse-bouche party.

It’s amazing what I get to do while unemployed. There are so many errands, I don’t know how they got done when I had a job. The past week alone, I ran all over the city finishing all sorts of businesses while also going to job interviews, seeing people I haven’t seen in a while and watching movies in the middle of the afternoon. If I didn’t have financial responsibilities, I swear I’d be enjoying this time more so than I did eight years ago when the Web first broke my heart. Heck, I’d be in Singapore with my brother and his wife, blowing through my savings and traveling all over Asia. Fuck, I hate being an adult!

But back to reality: I wanted to check another thing off my Things-To-Do list which is to start experimenting with baked goods. (You understand that I didn’t say “baking”, right? Because I’m a little bit of a pussy and I’m afraid of commitments.) I received a nice, hefty birthday gift certificate from a few friends and, though I already know it will go towards the Kitchen Aid Pro with sausage, pasta and ice cream maker attachments, I’m saving it until I’m ready to use it like a pro.

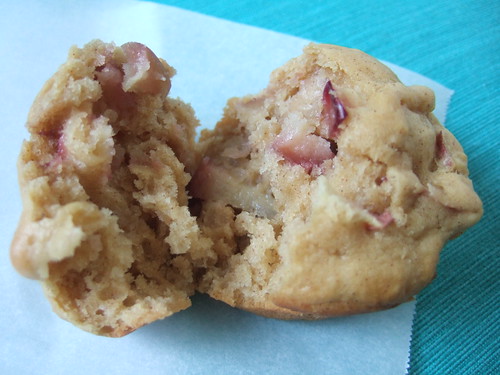
Financiers came to mind after scouring through my many cookbooks and realizing that it’s one of those basic French recipes that don’t require the use of an equipment. But because I’m also precise, I splurged on a $15 financier silicone mold–which explains the trip to JB Prince. I tried different flavors for my first batch of batter. I divided it into three small bowls and in one, I mixed in a tsp of ground coffee. In another, I added orange zest; I added finely chopped dried cranberries to the last batch. (Add your own flavor in Step 3 below.) After baking my first-ever financiers, I let them cool completely so as not to bother them in their molds until they were set. When I revisited them, they were basically popping themselves out of the molds and I didn’t have to turn them over. I have to say that my favorite were the ones with orange zest. This recipe makes twenty two-inch financiers in one mold tray.

Ingredients:
a handful of raw almonds
1/4 cup white sugar
1/4 cup of flour, sifted
2 egg whites
1/3 cup of butter
zest from a small orange
another small knob of butter to coat the molds, melted in the microwave for a few seconds

1. Preheat oven at 360º. Meanwhile, make your almond meal. In a food processor, process almonds until powdery. It’s okay that’s it’s grainy.
2. Make your beurre noisette. In a saucepan, melt the butter over low fire. Bring to a simmer and cook for 2 minutes, or until light brown and nutty-smelling. Set aside.
3. In a medium glass bowl, combine sugar and almond meal. Fold in the egg whites and mix well with a fork. Add the melted butter and continue to mix together. Stir in the flour and the orange zest and make sure everything is well-combined.
4. Butter your financier molds using a pastry brush. Pour the batter in each mold, filling it up just to the brim. Place batter-filled mold on a baking sheet. Bake for 18 minutes. Your financiers will puff up a bit and will get slightly crusty and golden on the edges, but soft on top. Remove from the oven and cool completely before turning them over on parchment paper.

Related post/s:
Feel free to feel bad for jobless me and buy me the Big Fat Duck book
Or the Kitchen Aid Mixer Pro
JB Prince is on the 11th floor of 36 East 31st Street, between Madison and Park Avenues

Squash and Potato Gratin with Manchego Cheese

I missed it when The Times first reported it last week: the Maya Schaper Cheese and Antiques store in the upper west side is going to be replaced by a coffee shop because of soaring rents. Good thing then that the Dr. and I stopped by today to buy some cheese. The Dr. picked up a beautiful stinky blue cheese while I walked around gasping at the prices of the Rococo-style plates I’d very much like to afford and own. I tasted the cheese he bought and got my own sliver, and I also picked up a Manchego because I wanted to use the butternut squash that has been sitting on my window kitchen sill since the last Supper with Strangers. (It was still good.)

I like baking gratins because they’re so easy. They’re a nice addition to a dinner setting: you get your starch and in this case, your vegetable, too. I love the hint of salt and savory in this recipe even though it’s a creamy baked dish. It went perfectly well with a pork shoulder roasted for three hours.

Ingredients:
1 butternut squash, peeled, chopped lengthwise, sliced thin
2 sweet potatoes, peeled, sliced thin like coins
2 cups Manchego cheese, shredded
1 pint heavy cream
2 cloves of garlic, minced
2 tbsps fresh thyme
a small knob of butter
salt, pepper

1. Preheat oven to 400º. In a saucepan, bring cream and garlic to a simmer. Remove from heat and set aside, stirring occasionally to keep the top from gelling.
2. Butter a 9″x13″ shallow baking dish. Spread the sliced butternut squash out in a single overlapping layer. Sprinkle with some of the salt, pepper and thyme and then about a third of the grated cheese. Top with half of the sweet potatoes, building a new overlapping layer. Again sprinkle with some of the seasonings and another third of shredded cheese. Use the last of the potatoes to make one final layer and top with the remaining cheese. Pour over the garlic cream mixture, distributing evenly.
4. Bake the gratin. Cover the dish with foil and bake on the middle rack for 30 minutes. Remove the foil, move the gratin to the top rack of the oven and bake, uncovered, for an additional 20 minutes. The top should be nicely browned and the vegetables soft. Remove from oven and let cool for 30 minutes before serving.

Related post/s:
A recipe for a simpler gratin
Sign up for 2009 Supper with Strangers

Red Pepper Flake Cornbread

This was a last-minute addition to my Thanksgiving menu this year. I’ve been cooking for three days but forgot to plan for a carb–I didn’t know Cameron was going to bring homemade biscuits–so I made my brother run an errand to buy buttermilk and corn at the grocery store in the morning. Cornbread is easy enough to make, but I was intrigued by this recipe because of the spiciness. I didn’t really know how it would translate to bread form.

The final product tasted like regular cornbread–mine came out paler because I used white sugar–but the kick in the end was a nice surprise. It even made my dad cough the first time because it was so unexpected.

Ingredients:
2 1/2 cups fresh corn kernels
1 tbsp red pepper flakes
1 cup white flour
3/4 cup cornmeal
1/4 cup brown sugar
1 tbsp baking powder
1 cup buttermilk
1 egg
2 tbsps butter
1 1/2 tsps salt

1. Preheat your oven to 350º with the rack in the middle slot.
2. In a medium glass bowl, whisk together the flour, cornmeal, sugar, baking powder and salt. In a separate bowl, whisk the buttermilk, egg and corn together. Pour the wet ingredients over the dry and stir until just combined. Set aside.
3. In a small saucepan, melt the butter and stir in the red pepper flakes and cook for 1 minute. Pour into a square baking dish. Top with the cornbread batter and level with a spatula. Bake for 45 minutes or until the edges are golden and the center is set. Remove from oven and let rest for up to 10 minutes before slicing into squares.

Related post/s:
egg in Brooklyn knows what to do with cornmeal
Corn muffins with bacon

Chunky Apple Muffins

After a full week of craving salty foods, I woke up Sunday morning eager to bake something sweet. I’m not a big fan of too much sweet, though, so I opted for an easy apple cake recipe minus half a cup of sugar. When I took out the baking pans from the oven, I saw an old muffin pan I’ve only used a few times. From there, I just decided to make muffins instead of cake so I can transport them easier to work the next day.

Ingredients:
1 red apple, peel on, chopped in small chunks
2 cups flour, sifted
1/2 cup brown sugar
2 eggs
1 cup buttermilk
1/4 cup butter, melted, plus a little extra to grease the muffin pan
1 tbsp baking powder
2 tsps cinnamon
1/2 tsp salt

1. Preheat the oven to 350º with the rack in the middle. Butter and flour a muffin pan.
2. Combine the flour, baking powder, cinnamon, sugar and salt in a large bowl. In a separate smaller bowl, whisk together the eggs and the buttermilk, and then the melted butter.
3. Pour the buttermilk mixture over the flour mixture. Fold in the apples. Stir until barely combined. Try not to over-mix so that it’s not too sticky.
4. Spoon a small amount of batter into each muffin hole so that it’s only halfway full. It will rise and will need the extra room later. Bake for about 15 minutes or until muffins are just set. Lower the oven temperature to 275º and bake for another 10 minutes or until a toothpick comes out clean from a gentle poke. Turn off the oven and leave the muffins inside until the oven cools back down. The muffins will continue to cook in the remaining heat.

Related post/s:
Muffins with bacon!
Day-old bread dessert

Sage Ice Cream

It’s probably not the right time to be posting recipes about ice cream, but I’m going to do it anyway because it’s so easy if you have an ice cream maker. Now, to me an ice cream maker is one of those things you register for when you get married. I’m not on that path so I had to borrow one from someone who recently tied the knot. I must say that it will be my next purchase as soon as I have my own kitchen space. (Of course that’s what I said before I got the three Le Creusets, the tagine and the bamboo steamer.)

Sage came up as a possible pairing for our pumpkin-squash Supper theme last month. The herb itself is so fragrant that in ice cream form, it overpowered the cake and chips I wanted to match it with. In the end, we served a more subtle pumpkin ice cream to complete a last course we called Trio of Pumpkin, and now I have a whole tub of sage ice cream sitting in the freezer reserved for those quiet nights indoors.

Ingredients:
2 cups heavy cream
2 cups half-and-half
1/3 cup fresh sage, coarsely chopped
4 large strips of lemon zest, peeled using a peeler
9 egg yolks
3/4 cup white sugar
1/4 tsp salt

1. In a heavy saucepan, bring cream, half-and-half, sage and zest to a boil over moderate heat. Remove from heat and cover the pot for 10 minutes.
2. Meanwhile, whisk together yolks, granulated sugar and salt in a large bowl. Pour in half of the hot cream and whisk to combine. Transfer to the saucepan to combine with the remaining hot cream. This is your custard.
3. Cook custard over moderate heat while stirring constantly with a wooden spoon. Do not let it boil. After about 5 minutes, the custard should be thick enough to cover the back of your spoon.
4. Pour custard through a fine sieve into a bowl and let cool in room temperature, stirring occasionally. Cover with Saran wrap and store in the refrigerator until cold, at least 1 hour.
5. Using an ice cream maker, pour in chilled custard and churn, following manufacturer’s instructions. Mine took about 20 minutes. Scoop out of ice cream maker and transfer to a resealable plastic container and put in freezer to harden.

Related post/s:
October Supper with Strangers photos on Flickr
Use up your leftover sage with chicken