Rhubarb Crumb Cake

When Melissa Clark of The New York Times published this recipe, I read it over and over until I completely understood the process. I needed to make sure that making a crumb cake won’t require a Kitchen Air mixer. I don’t have one because I rarely bake, but the Dr. absolutely loves any type of dessert that has tart in it. The first time I ever baked with rhubarb, he ate every crisp. It’s spring and rhubarb is out in the markets–I wanted that reaction from him again. What can I say? I aim to please.

I made a mistake and left out 6 tablespoons of butter to make the cake. My version came out perfectly dense with the right amount of moisture and fluff, so I’m keeping the extra butter out from the recipe below. I started preparing at 9pm and the Dr. was eating his share by 11pm. At least he brought the vanilla ice cream with him.

Ingredients:
For the rhubarb filling:
6 stalks of rhubarb, trimmed, cut into 1/2-inch pieces
1/4 cup white sugar
1/2 tsp ground ginger
2 tsps cornstarch

For the crumbs:
1 3/4 cups of flour
1/3 cup dark brown sugar
1/3 cup white sugar
1 tsp ground cinnamon
1/2 tsp ground ginger
1 stick of butter, melted in microwave for 30 seconds
a pinch of salt

For the cake:
1 cup flour
1/2 cup white sugar
1/3 cup sour cream
1 large egg
1 egg yolk
2 tsp vanilla extract
1/2 tsp baking soda
1/2 baking powder
1/4 tsp salt

1. Using some of the melted butter, grease an 8-inch square glass baking dish. Set aside.
2. Prepare the rhubarb filling. In a big glass bowl, toss the rhubarb with the sugar, ginger and cornstarch. Set aside.
3. Make crumbs. In another large glass bowl, whisk together brown and white sugars, spices, salt and melted butter until smooth. Stir in flour with a spatula. They should look like, well, crumbs. Set aside.
4. Preheat oven to 325º while preparing the cake. In another large glass bowl, stir together the sour cream, egg and egg yolk, with the vanilla. Mix in the flour, sugar, baking soda, baking powder and salt using a spatula. Keep folding until it has the consistency of batter.
5. Scoop about half of the cake batter into the greased baking dish, covering the bottom. Spoon rhubarb filling over batter. Then cover with the rest of the batter over the rhubarb. This layering doesn’t have to be even. Using your fingers, scoop the crumbs and sprinkle on top of the rhubarb-filled cake batter.
6. Bake crumb cake until a toothpick inserted in the center comes out clean of batter, about 55 minutes. Remove from oven and let cool on table counter before serving with vanilla ice cream.

Related post/s:
The Dr. liked my rhubarb crisp, too
I wouldn’t mind a Kitchen Air mixer from thefind.com
What’s the difference between baking soda and baking powder?
So how come this recipe asks for both baking soda and baking powder?

Pearl Onion-Infused Martini

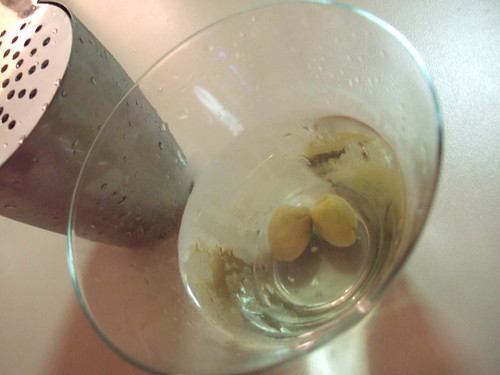
From the Dr., I learned how to order and drink martinis. When we were at Applewood in Brooklyn last year, he ordered their pearl onion martini. The onion flavor was strong, but it made for a perfect drink after a stressful day at work. Any new obsession costs money, so I infused my own vodka a few months ago to save $16 per drink. Last night, I took the bottle out of the freezer and we finally made our own martini at home.

There are several ways to make a martini. We like vodka-anything, so I recommend Kettle One vodka for this recipe. You can pick up dry Martini & Rossi vermouth from any liquor store. We also prefer our martini shaken instead of stirred. When you shake the vodka with ice cubes, some of the ice melts and adds a little water to your drink. This softens the bite of the alcohol. Of course, too much water will make the drink limp, so practice makes perfect. We also like our martinis dirty which only means including the olive brine in the drink. While James Bond may find errors in this recipe, we’re quite happy with it.

Ingredients:
1 bottle Kettle One vodka
1 small bag of pearl onions, peeled, some halved
dry vermouth
1 jar of olives with brining juice
ice cubes

1. Using a large pickling jar, combine the onions and the vodka. Let sit in room temperature. Save the original vodka bottle for later.
2. After a week and a half, strain the infused vodka back into the original bottle. Discard all the onions. Store in the freezer until ready to make your own martinis.

For the martini:
1. While preparing martini, put ice cubes in cocktail glass with a splash of vermouth. Set aside to chill.
2. Using a martini shaker, combine ice cubes, two shots of the infused vodka and a shot of the olive brine. Shake well.
3. Discard ice cubes and vermouth from cocktail glasses. Strain contents of the mixer into the glasses. Garnish with a couple of olives.

Related post/s:

Find stemless martini glasses at thefind.com
Find martini shakers at thefind.com
Applewood Restaurant in Brooklyn
If you prefer non-alcoholic drinks, ginger-mint citrus iced tea is one of my favorites

Sullivan Street Bakery’s No-Knead Bread

Last November, The New York Times published this no-knead bread recipe from Jim Lahey of Sullivan Street Bakery and food bloggers everywhere went berserk. But it requires some time and I couldn’t squeeze in a day and a half to try it myself last year. Fast-forward five months later and I’ve adjusted the recipe according to the trials and errors posted on the Web and finally tried it at home this past weekend when the summer weather called for my own homemade bread.

As you may or may not know, I’m scared of baking. I’m a better cook than baker because with cooking, I can adjust ingredients and steps by taste. I feel like with baking, I can never turn back. Baking makes me afraid of making mistakes while cooking allows me to make room for circumstances that may be beyond my control. So you can imagine when I tried this recipe and it came out looking like, well, bread. I was squealing with delight! I sat down with my mother, opened a bottle of Chateau de La Chaize and ate it with cheese and anchovies, pintxos style.

Ingredients:
3 cups all-purpose white flour, more for dusting
1/4 tsp instant yeast
1 1/4 tsp salt
1 1/2 cups water

1. In a large glass bowl, combine flour, yeast and salt. Add 1 1/2 cups water and stir with a wooden spatula until blended. Your dough will be sticky. Cover bowl with plastic wrap. Let dough rest at least 12 hours, preferably about 18, at warm room temperature, about 70 degrees.
2. Dough is ready when its surface is dotted with bubbles. Lightly flour a work surface and place dough on it. Sprinkle it with a little more flour and fold it over on itself once or twice. Cover loosely with plastic wrap and let rest for about 15 minutes.
3. Using just enough flour to keep dough from sticking to work surface or to your fingers, gently and quickly shape dough into a ball. Generously coat a cotton towel (not terry cloth) with flour. Put dough on the towel and dust the top of the dough with more flour. Cover with another cotton towel and let rise for another 2 hours. When it is ready, dough will be more than double in size and will not readily spring back when poked with a finger.
4. At least 30 minutes before dough is ready, heat oven to 450º. Put a large Dutch oven in the oven as it heats. When dough is ready, carefully remove pot from oven. Gently place dough into pot. It will still be a little sticky. Shake pan once or twice if dough is unevenly distributed. It may look like a mess but it will straighten out as it bakes. Cover with lid and bake for 30 minutes, then remove lid and bake another 15 minutes, until loaf is beautifully browned. Cool on a chopping block.

Related post/s:
Make it or buy it from Sullivan Street Bakery
Pintxos style, the way they do it in Barcelona

Bacon Corn Muffins

One of the best presents I received this year was a 3-month Bacon of the Month Club membership from Zingerman’s. Cameron just knows what the hell I would squeal over for my birthday. I love that Aaron and Pete understood that a box of pork delivered at work would be something I would actually want.

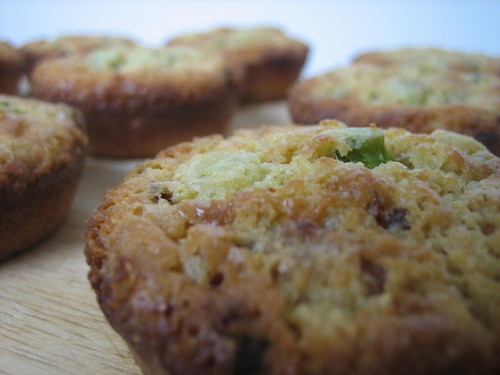
For the first installment, I received a pound of Applewood bacon. I could have easily had bacon and egg breakfasts throughout my entire week off from work until all the fat killed me, but I wanted to do something more special with my present. I searched for several bacon recipes, edited them to my own style and shared the bounty with family and friends. After all, what is Christmas without the sharing? When these bacon corn muffins were warm enough, they were packed in a large Ziploc bag and stuffed in a hand-carry tote, eaten onboard a plane.

Ingredients:
1 1/4 cups whole milk
1 large egg
3/4 stick unsalted butter, melted
1 cup yellow cornmeal
3/4 cup all-purpose flour
4 stalks scallions, chopped
4 bacon slices
2 tbsp sugar
1 tbsp baking powder
pinch of salt

1. Cook bacon. Using a skillet, cook bacon until almost-crisp. Remove to a paper towel-lined plate. When cool to touch, roughly chop. Set aside.
2. Preheat oven to 375º. Whisk together milk, egg and butter in a small bowl. In a different bowl, whisk together remaining ingredients. Add bacon. Combine both mixtures and stir.
3. Grease a 12-muffin pan and fill in with mixture. Bake on middle rack until golden and a toothpick comes out clean, about 15 minutes. Turn off heat and cool in oven for about 5 more minutes.

Related post/s:
Zingerman’s Bacon of the Month Club
Turkey Bacon Avocado Portobello Sandwich
Bacon-Wrapped Scallops

Bread Pudding with Caramel Sauce

I never really bake because I’m not a big fan of desserts. When I tell my friends who love to bake that I am a better cook because I can just throw ingredients in a pot and make a nice dish out of it, they tell me the same thing–that they throw eveything in a bowl and bake. I honestly think baking requires more skill and patience. I can chop vegetables until my hands are numb so I can make my own Vietnamese summer rolls and I enjoy braising and waiting for my beef bourguignon to come out of the oven, but I have no patience to wait for anything to turn golden brown. If I need more than my finger to poke and see if it’s cooked inside, then I don’t want it.

I bought a loaf of ciabatta bread the other day to make some pizzetta for dinner and ended up only using less than half of it. I didn’t want it to go to waste so I picked up a quart of heavy cream the next day and actually baked pudding when I got home. Sure enough, it took a few TV shows before they were the color I imagined the top of pudding should be, but they actually came out perfectly. I used a 12-muffin tray and topped them with caramel sauce and packed them for sweet-toothed co-workers the next morning.

Ingredients:
1 big loaf of day-old bread
3 eggs
3 egg yolks
1 cup maple syrup
2 cups heavy cream
1 cup milk
2 tsps vanilla extract
2 tbsps butter

1. Prepare everything before baking. Preheat oven to 300º. Grease muffin tray with melted butter. Set aside. Slice and break bread into small pieces and fill each muffin hole.
2. In a large glass bowl, whisk together eggs and egg yolks. Add 3/4 cup of the maple syrup, 1 cup of the heavy cream with the milk and vanilla. Pour this mixture into each muffin hole with the bread, enough to make sure they are swimming.
3. Fill a deep baking tray with about 2 inches of water. Place the muffin tray in the baking tray and bake until golden brown, about 1 hour. If necessary, gently flip each muffin with a spatula and cook the bottom of the muffins until they are also lightly browned.
4. During the last 30 minutes of baking, make the caramel sauce. In a small non-stick pan, heat the remaining maple syrup and whisk in the other cup of cream until thickened. Add the butter and a pinch of salt and keep whisking in low heat until caramelized.
5. When ready to serve, place muffins on a plate and pour caramel sauce on top.

Related post/s:
Where I buy ciabatta bread
Leftover ciabatta bread