Vegetarian Lasagna with Eggplant

Can you believe I made something without meat? It’s not some kind of new year resolution or anything, I just really need to use the pesto sauce I made last year that’s been sitting in the fridge for what seemed like forever. I couldn’t believe it was still good! (This dish fed 5 people and no one got sick!)

I don’t have any experience with lasagna except for the fact that I have to create layers to make it look legit. (“Lasagne” refers to multiple sheets of pasta; “lasagna” refers to the dish or to individual sheets of pasta.) The steps here were pretty much common sense, but I had no idea how the besciamella sauce texture was supposed to be like. I felt like my version was too watery after I imagined it to have more of a ricotta cheese consistency. To be honest with you, I’m not even sure it’s necessary here. My pesto was so good that I barely tasted the besciamella to know that it made any difference. (Don’t tell the lasagna police!) Why don’t you try it without? The olive oil absorbed by the eggplant was enough to keep the dish rich and moist. Buy a good quality jar of pesto from your local farmer’s market and you barely have to lift a finger to make this dish.

Ingredients:
1 box of wavy lasagna pasta
salt
olive oil
1 medium eggplant, thinly sliced
cooking spray
1 cup of besciamella sauce
1 cup pesto sauce
1 cup Pecorino Cheese, grated
1/2 cup bread crumbs

For the besciamella sauce:
3 tbsps butter
2 tbsps flour
2 cups milk
salt
nutmeg

1. Bring a large pot of water to a boil and add about 2 tbsps of salt. Prepare a bowl of ice water. Cook the lasagne sheets in the boiling water 2 minutes less than the package instructions recommend. Drain, put in the ice bath and separate each sheet by hanging them off your colander rim.
2. Heat olive oil over medium fire in a large sauté pan. Add eggplant in batches and cook until golden brown and soft, about 5 minutes. Feel free to keep adding olive oil for each batch. Drain on a paper towel and set aside.
3. Make besciamella sauce. Heat butter in a medium sauce pan until melted. Add flour and stir until smooth. Cook over medium heat until light golden brown, about 7 minutes. Meanwhile, heat the milk in a separate pot until just about to boil. Add milk to butter mixture 1 cup at a time, whisking continuously until very smooth and bring to a boil. Cook 30 seconds and remove from heat. Season with salt and nutmeg. Set aside.
4. Preheat oven to 400º. While oven is preheating, prepare lasagna. Coat a 13×9 baking pan by spraying with cooking spray. Layer 4 sheets of lasagne on the bottom of the pan. They can overlap. Top with 6 slices of eggplant and 3 tablespoons of besciamella sauce. Repeat the step for another layer, but this time, add 3 tbsps of pesto sauce. Repeat these 2 layers for a total of 4 layers. End with 4 sheets of lasagne, remaining besciamella sauce and grated cheese. Sprinkle with bread crumbs. Place baking pan on a baking sheet and bake for 20 to 25 minutes, or until bubbling and golden brown on top.

Related post/s:
Homemade basil pesto recipe

Homemade Pici Pasta with Tripe

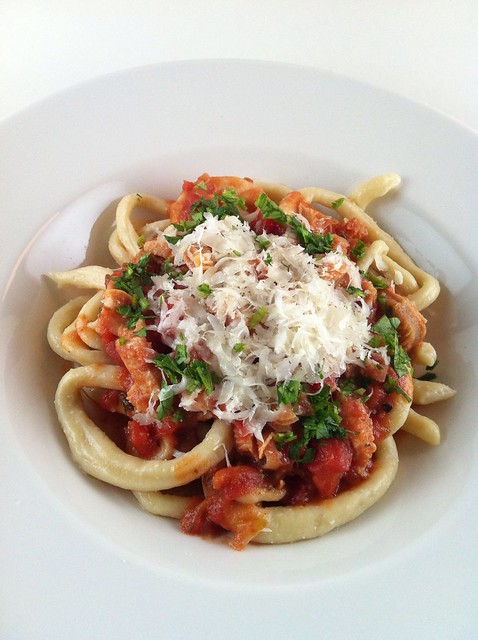
I had to waste four cups of flour before I perfected this recipe. The first recipe I found online did not require eggs nor all-purpose flour, just semolina and water. I thought that was odd, but I gave it a try anyway. I should have trusted my instinct. The “dough” refused to stick together and just ended up becoming a shredded mess. I found another recipe that required eggs but did not list semolina, so I thought I’d combine the two instructions until the dough felt right in my hands, just like I learned in my gnocchi class last year.

And what exactly is “right”? I’m not sure if I can describe, but after I mixed the flour with the eggs, I freely sprinkled the kitchen counter with semolina and started kneading. Every time the dough got a little sticky, I dusted with more semolina to allow me to continue kneading it. I stopped until the dough felt pliable enough to cut and roll into snake-like noodles. That’s the word I was looking for! Pliable!

It took an hour to make the pici and they looked like they weren’t going to feed more than two people, but as soon as I cooked the pasta and distributed them to three deep serving dishes, I had enough for two more servings the next day. The cooked pasta was plump and I really needed just one tong-heaping for each person.

Caz Hildebrand’s The Geometry of Pasta is an awesome book about pasta with really cool illustrations.

Ingredients:
2 pounds of tripe, thawed, thoroughly washed, dried with paper towels
salt
vanilla
3 cloves of garlic, minced
1 red onion, chopped
1 can tomato sauce

For the pici pasta:
3 cups of all-purpose flour
3 eggs
1 to 1 1/4 cups of lukewarm water
olive oil
semolina flour
any hard cheese, shaved
some parsley, finely chopped

1. Prepare the tripe. Cut the tripe into smaller square sheets and cook in a large pot of boiling water with the salt and vanilla for about an hour, or until the tripe is tender. It’s okay that they are still a little chewy; just make sure it’s not rubbery. Drain and slice into smaller pieces.
2. Make the pasta while the tripe is cooking. Pour out the flour on a clean kitchen counter surface and create a hole in the middle. Crack each egg in the center of the well and mix with a fork. When the egg is mixed into the flour, begin to add a tiny bit of water at a time, each time trying to mix in as much flour as possible. When all of the flour is mixed in, begin to knead the flour. You’re going to probably do this for about 8-10 minutes. When complete, make dough into a mound and pour a teaspoon of olive oil on top. Cover with a dish towel and let it rest for 10 minutes.
2. Cut the dough into smaller pieces and roll each into thin dowels and into snake-like noodles. Place the pici on a sheet tray that has been dusted with semolina flour and cover the pasta with the dish towel. Set aside until ready to use.
3. Make the sauce. In a large pot, heat some oil. Sauté some garlic until light brown. Add the onions and sauté until translucent. Add the tripe and cook by sauteéing. Lower the heat and add the tomato sauce. Mix and simmer for 10 minutes, just enough to incorporate the tomatoes.
4. Cook the pasta. Salt a large pot of water and put over high heat until boiling. Add the pici and cook for 10 minutes or until al dente. Use tongs to remove them from the water onto deep serving dishes. Top with sauce, cheese and parsley.

Related post/s:
Homemade gnocchi the Rustico Cooking way
Tripe tacos in Sunset Park, Brooklyn

Spaghetti with Anchovies and Arugula

Do you ever crave salty food? Last weekend, when I opted to stay in and take cat naps in between eating, all I wanted was salty food. Throughout the Two Days of Nothing, I caught up with Words with Friends games I’ve neglected, organized my music files on Spotify (well, I tried to) and endlessly snacked on leftovers and cooked small easy dishes to fulfill my meal requirements.

This pasta dish is one of those easy ones. I used spaghetti because it’s all I had in my pantry, but I think bucatini works better for its thickness. I sure hope you keep jars of anchovy fillets in your kitchen–they’re very useful for salad dressings, sandwiches and pasta dishes like this one. You can go all fancy and get the Italian brands that cost more than $10 for a small jar, or find a small can of it for less than $3 at your local grocery store. I prefer the anchovy fillets in olive oil, but the ones in water will do if you just drain them before adding to the dish.

Ingredients:
a fist of spaghetti or bucatini
salt
oil
4 cloves of garlic, minced
a small jar of anchovy fillets in olive oil
red pepper flakes
a handful of arugula
parsley

1. Bring a large pot of water to a boil with some salt.
2. While waiting for the pasta to cook al dente, heat up some oil in a deep skillet on the next burner. Sauté the garlic in medium heat and then add the anchovies. Sprinkle in some red pepper flakes. When the garlic sizzles and the anchovies break up, turn the heat down to low.
3. The pasta should be al dente at this point. Transfer the pasta to the skillet using tongs. Toss to combine the anchovy with the pasta. Drizzle in some of the pasta water to avoid drying it up. Add the arugula and the parsley and turn off the heat. Cook the greens in the remaining heat. Add salt if necessary.

Related post/s:
Make an awesome tuna sandwich with your leftover anchovy
I love the chewy anchovy side dish in New Malaysia restaurant

Gnocchi with Sage Cream Sauce

After the sixth egg, I just knew I had to finally get a real Italian to teach me how to knead pasta dough properly. I had wasted enough flour and eggs trying to make my own while following written instructions and videos online. For one reason or another, I just couldn’t get the dough to roll into one; it kept breaking into shard-like pieces. I had no idea how it should feel under the bottom of my palms and had no basis of comparison since I’ve never made my own pasta before.

I’ve been trying to get in the recreational pasta class at the Institute of Culinary Education, but every time I checked their calendar, the class would be full. They never sent out any emails to announce when new classes opened up so I couldn’t even try to sign up earlier. Another search for pasta-making classes in New York City revealed Rustico Cooking in the midtown area. I signed up and spent half an afternoon in an open-loft kitchen with a few couples and, thankfully, some who came on their own. It turned out to be a very productive afternoon and a great–and more affordable–alternative to ICE or the French Culinary Institute.

During our three-hour class, we watched and followed founder and chef Micol’s instructions on how to make gnocchi, cavatelli and tagliatelle. I felt the mashed potato and the flour in my hands when making the gnocchi: I kneaded, rolled and cut the dough. I left the class feeling like I could do the three recipes on my own.

This is my first attempt in trying to replicate the gnocchi-making technique I’ve learned in class. I bought my own potato ricer and dough cutter for this recipe. I didn’t really want to buy any more toys for my kitchen, but the potato ricer is one of the most amazing gadgets I’ve ever come across: mashing potato will never be the same.

I think the dish turned out well even with my made-up sage cream sauce. Admittedly, my gnocchi wasn’t as light and fluffy as Micol’s, and I’m not sure if it’s because I used yellow potatoes instead of the recommended Yukon gold, or if I didn’t get the precise cup and a half measurement for the flour. But I can at least say that I’ve done it myself–there’s really no going anywhere from here except better pasta.

Ingredients:
1 1/2 pounds of yellow potatoes
1 1/2 cups of unbleached flour, plus more for kneading
1/2 stick of butter
4 sage leaves
1 cup of heavy cream
1/2 cup of Parmigiano-Reggiano cheese, grated
salt
pepper

1. Make the gnocchi. In a large pot, cover the potatoes with water and let boil under medium fire, until fork tender. Drain, peel and mash onto a clean counter surface using a potato ricer. Mix with flour and knead until smooth.
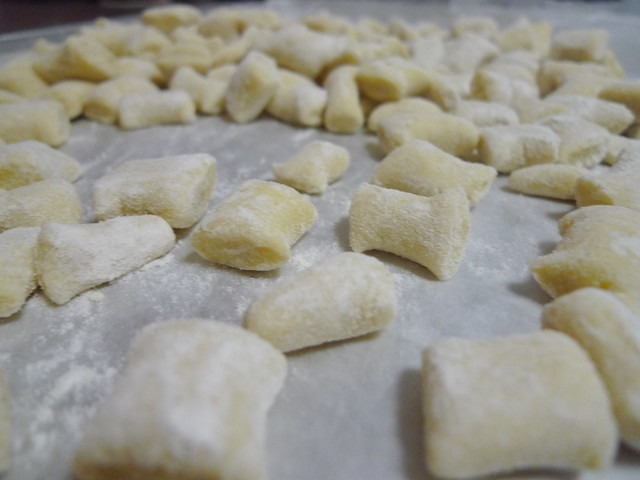
2. Cut dough into small chunks and roll each chunk into a thin snake-like shape. Cut into one-inch pieces to make gnocchi. Gather all gnocchi on a lined bake sheet and sprinkle with flour to avoid sticking.
3. Make the sage cream sauce. In a heavy skillet, melt the butter. Add the sage leaves and fry. When leaves are lightly browned, add the cream and the cheese with some pepper. Stir continuously with a whisk until well combined.
4. In the meantime, cook the gnocchi. Put a pot of water to boil with some salt. Add the gnocchi and wait for them to float to the surface. Scoop the gnocchi using a slotted spoon and transfer to a sieve and then to a plate. Pour enough cream just to slightly cover the gnocchi.

Related post/s:
Sign up for a pasta-making class at Rustico
My first attempt in making gnocchi wasn’t too successful
Sage ice cream recipe

Vermicelli Noodles with Summer Vegetables and Peaches

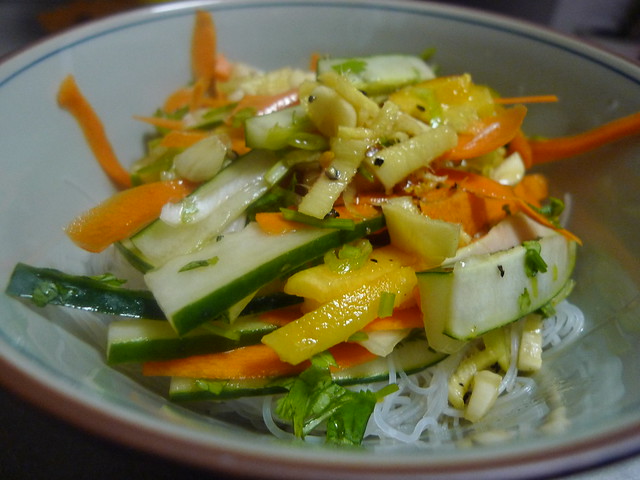
The Edible magazines you see at farmers’ markets are usually a good source for recipes using seasonal ingredients. I picked up Edible Piedmont while I was in North Carolina and adapted Sandra Gutierrez’s peach salad recipe. The peaches in Raleigh were ridiculously sweet and juicy. I only had a carry-on luggage with me, but I ended up lugging two shopping bags full of produce back which included a large basket of ripe peaches.

Whenever I travel, I make sure to stop at the local markets. Besides checking out the interesting and local produce, markets make good people-watching. And where there are working people, there’s usually food. It was no different in the North Carolina State Farmers’ Market. I ate sweet, sweet corn, fleshy sprite melons and cantaloupes, ripe heirloom tomatoes and picked on all kinds of plums, all for half the price of what they would be in New York City! I ate most of the peaches as they were, but with the remaining pieces, I made this salad to beat the summer heat.

Ingredients:
1/3 cup of rice vinegar
2 tbsps sesame oil
a knob of ginger, peeled, grated
1 Thai chile, halved
3 garlic cloves, minced
salt
pepper
ice bath
1 package vermicelli noodles
2 scallions, chopped
2 ripe but firm peaches, pitted, sliced
1 carrot, thinly sliced
1 cucumber, seeded, thinly sliced
a handful of cilantro, roughly chopped

1. Make the vinaigrette. Combine the rice vinegar, sesame oil, ginger, chile and garlic in a blender and blend until smooth. Taste and season with salt and pepper. Set aside until ready to use.
2. Boil some water in a pot. While waiting for the water to boil, soak vermicelli noodles in cold water for about 15 minutes. Drain and set aside. Add to the boiling water and cook for 3 minutes. Drain and transfer to an ice bath. Drain again and dry with paper towels.
3. Assemble the salad. In a large bowl, toss the noodles with the vegetables and the peaches. Splash with the vinaigrette and mix until well-combined. Serve or chill before serving.

Related post/s:
See? I was already trying to bake in 2008!
My first visit to Le Bernardin had warm peaches topped with strawberries