Lemon-Ricotta Muffins

The last few times I watched Lisa bake, I was in awe at how easily she had a dozen muffins and a pie done. I realized that it was the KitchenAid mixer that helped her move faster; I don’t know why I always insist on mixing batter by hand! I guess to me doing it without the machine left me with less utensils to wash, but now I know better. I also learned how to be patient and leave the oven alone until the baked goods rose; this helped them keep their intended shapes. Now I know why mine always collapsed in the middle! I’ve always been from the school of poking while cooking when it comes to meat, but now I know you’re not supposed to do that while baking.

I was determined to work like she did the next time I tried baking at home. When that chance came up, I looked for a muffin recipe that used ricotta cheese because I had a pint of it left after I made my own ricotta-filled raviolis. I just needed two lemons to complete the recipe below.

I highly recommend the Microplane Premium Classic zester (mine comes in a pretty turquoise handle) to make some very fine lemon zest. You see a gadget like it in the store and you immediately think, Who really needs that much zest that another tool had to be invented for it? It turns out there’s a huge difference from finely-chopping lemon peel to using a sharp zester. Again, negative points to trying to do things by hand.

My only regret is not adding slivers of fresh strawberries or almonds on top to give it a prettier presentation. Next time I will, now that I know muffins are so much easier to make with the right tools.

Ingredients:
2 cups flour
1/2 tsp baking powder
1/2 tsp baking soda
1/2 tsp salt
1 cup plus 1 tsp sugar
1 stick unsalted butter, room temperature
finely grated lemon zest from 2 lemons
1 cup whole-milk ricotta cheese
1 large egg
1 tbsp fresh lemon juice
1/2 tsp almond extract

1. Whisk the flour, baking powder, baking soda, and salt in a medium bowl to blend. Using an electric mixer, beat 1 cup sugar, butter, and lemon zest in a large bowl until light and fluffy.
2. Beat in the ricotta. Beat in the egg, lemon juice, and almond extract. The batter should be thick and fluffy.
3. Line 12 muffin cups with paper liners. Preheat the oven to 350º. Divide the batter and fill each prepared muffin cup halfway. Bake until the muffins just become a tad golden on top, about 20 minutes.

Recommended tool/s:
Microplane Premium Classic Zester

Chicken with Caramelized Shallots in Sherry Sauce

I roast chicken for myself at least once a month because there’s always a lazy, quiet day that’s perfect for a properly roasted chicken. What I didn’t know until this past weekend is that I can roast one and serve it to dinner guests. I always want to impress when I invite guests to my home and have always thought that the more work I put into cooking, the better the food. And it has been for the most part; I just never thought chicken was something that would bowl people over. With this recipe, however, using sherry vinegar sauce and then served with other dishes that included apples, it made a whole autumn feast presentable. I saved so much time cooking chicken instead of my usual repertoire that I was able to make three separate vegetable sides plus a cake for dessert!

If you have a good butcher, ask them to debone the chicken and cut in half, but leaving the legs and wings intact. You may also buy separate chicken pieces; about 3 pieces will fit into a large oven-safe skillet. If you have an iron grill press, it’s good to use it to keep the chicken pieces flat. If you only have a Teflon frying pan (which you certainly can’t put inside the oven), you’re better off using the same baking pan you’re using for the shallots just so it’s hot before cooking the chicken–just remove the shallots after roasting to avoid burning them.

I also saved the rendered fat from the chicken and for leftovers the next day. I fried some white rice and added a blob of it (there’s no better way to describe it) to make a quasi-Hainanese chicken rice. It was so delicious and guiltily satisfying with some pickled cornichon to cut through the grease.

Ingredients:
6 pieces of chicken thighs and breasts
salt and pepper
10 shallots, peeled
a stick of butter
vegetable oil
1/4 cup of sherry vinegar
thyme sprigs

1. Preheat the oven to 425º. Season the chickens generously on both sides with salt and pepper. Set aside.
2. Place the 6 of the whole shallots in a small baking pan. Toss with salt and pepper, add a medium-sized knob of butter and pour in 1/4 cup water. Cover with aluminum foil and roast for 20 minutes. Uncover and roast for 15 minutes longer or until the shallots are tender and golden. Set the pan aside.
3. When you’re ready to roast the chickens, place two oven-safe skillets in the oven for 15 minutes. When the skillets are hot, carefully remove them from the oven and add vegetable oil to each skillet. Place 3 chicken halves in each skillet, skin side down. Roast for about 30 minutes,
checking halfway through, until the juices from the thigh run clear.
4. Remove the skillets from the oven and pour off the fat in a separate container for later use. Turn the chicken pieces over, skin side up and deglaze each pan with 1/4 cup of sherry vinegar, gently scraping the bottom to release any browned bits. Add another knob of the butter, thyme and 2 shallots to each pan. Return to the oven and roast for 3 extra minutes.
6. To serve, place a chicken piece, a couple of shallots and a bit of the pan sauce on each plate. Fry some rice with the chicken fat for an Asian flair. Garnish your plates with thyme sprigs.

If you have more time and feeling like you need a challenge, why don’t you try to prepare your own chicken suprême, or a semi-boneless poultry breast half with the wing joint still attached? A new iPad app from Inkling called The Professional Chef has amazing videos and photographs from the Culinary Institute of America. Unlike cooking demos on TV, you don’t get bogged down by the screaming obnoxious white-haired guy–you can just concentrate on the cooking matter at hand with the calm narrating voice guiding you at every step. You may buy each chapter for $2.99 (Chapter 16: Fabricating Meats, Poultry, and Fish) or the entire app for less than $50 using the link below.

Recommended tool/s:
The Professional Chef iPad app from the Culinary Institute of America

Foraging with Wildman Steve

After reading about Bon Appétit, a sustainable-minded food catering company based in–of course–California, and its efforts to get even more local by switching the roles of some of their managers and chefs to “foragers”, I immediately thought, Well, they should call Wildman Steve.

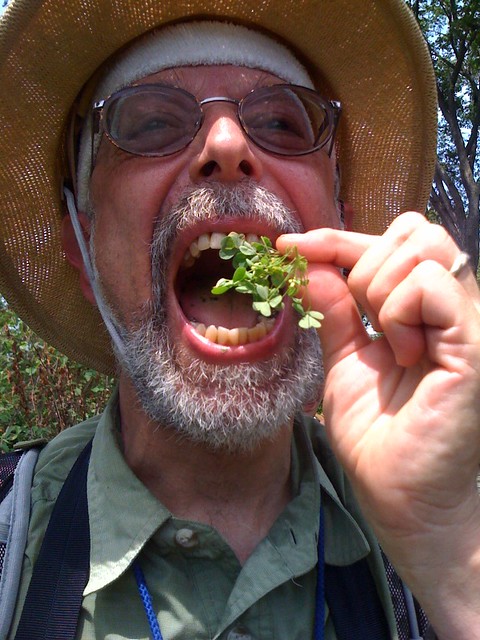
I don’t remember how I first heard about Wildman Steve, but I’ve since kept him in the back of my head for when my schedule allowed me to join one of his foraging tours in Central Park. One super humid summer day, me and about fifteen others met in the upper west side of the park to forage for berries and cherries, epazotes and sasafras, and probably the last garlic bulb of spring and the first burdock of fall. The bonus was learning how to spot poison ivy; how amazing it was to see so many all over the park where clueless pedestrians and their pets run around!

Unfortunately, the rest of the summer didn’t allow for much cooking in the kitchen so I wasn’t able to use the produce I took home except for the berries that went into a pint of homemade ice cream, but I did gnaw on all of the stuff the Wildman showed us along the way. I completely trusted that he knew what he was doing and picking. I’m glad to report that there were no weird stomach pains after.

Here’s a list of plants we came across in and around 103rd Street and Central Park West:

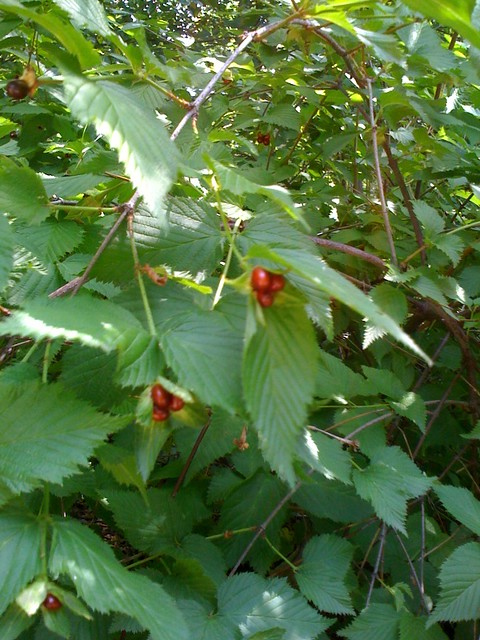
1. European Cut-leaf Blackberries – I was so surprised to see a fruit tree in the park! Now that I know where they are, I’ll just pick these in season.

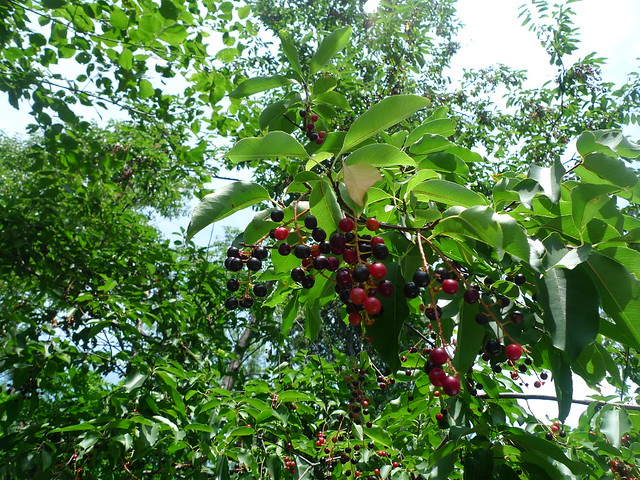
2. Native Black Cherries – I took home a lot of these using the plastic take-out containers we were advised to bring. A subtle ice cream was made at home afterward.

3. Epazote – You can dry and save these for use in a Mexican dish

4. Lamb’s Quarters – You can use them in quiche or cook them like you would spinach

5. Poor Man’s Pepper – They tasted like mustard seeds and Wildman said they would be great in miso soup

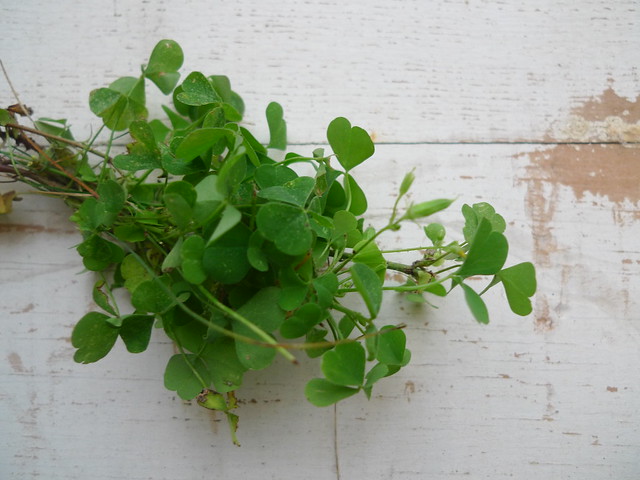
6. Wood Sorrel – You’ve seen these growing like weeds and you thought that you could find a four-leaf clover among them. You won’t.

7. Mayapple – Wildman crossed a fence and picked these small plums that taste like passionfruits

8. Common Plantain – These are also everywhere in the park. I’ve always thought they were just some kind of weed, but you can mash the leaves and rub them all over yourself to keep the mosquitoes off. The small seeds had a hint of peanut taste.

9. Garlic Mustard – The plant that keeps on giving: you can use the leaves for a garlic pesto, the buds and the sprouts like chives, the roots like horseradish, the seeds like mustard seeds!

10. Jetberries – I see these all the time, too, and now I know that if a berry bush has some sharp and ragged-edged leaves, they are poisonous!

11. Asiatic Dayflower – They look like tiny string beans

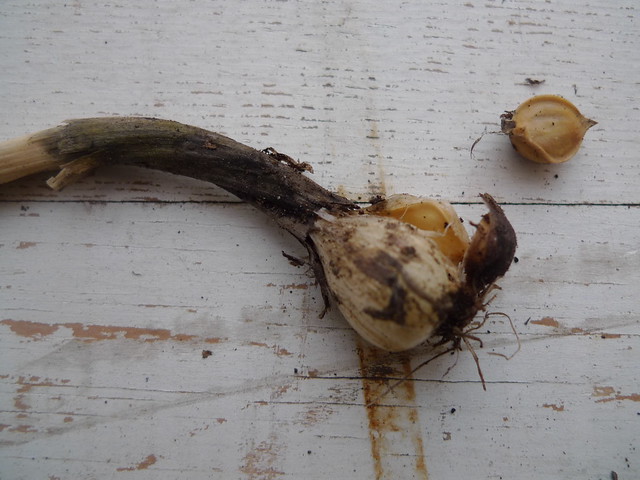
12. Field Garlic – I was very happy to see garlic even though we only found one whole bulb because it’s way past spring. They’re definitely stronger than your grocery store garlic bulbs.

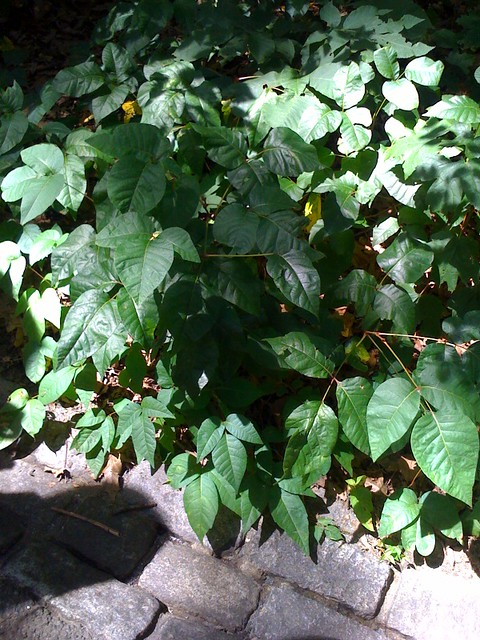
13. Poison Ivy – We spotted a few plants around the park which took me by surprise because dog owners may be walking their pets along the paths not knowing they’re sniffing them! Now I know how to tell them apart: they have three leaves per stalk, but the smaller two connect directly to the twig.

14. Sasafras – Commonly known as the plant that makes root beer, Wildman Steve showed us the leaves in three different shapes.

15. Fawn Mushroom – Fortunately, we found one mushroom by some tree. Unfortunately, a squirrel got to it before we did. Fawn mushrooms grow on wood, have blush-pink gills and have a space in between their gills and stem. If you want to see more mushrooms, sign up for the tour after a whole lot of rain.

16. Jewelweed – Wildman Steve sprinkled some water onto their leaves and the droplets repelled and looked like jewels, hence the name. They are known to help your poison ivy rash, so grab some of these after you step on the ivy plants during the tour.

17. Sweet Pepper Bush – You can rub and juice the hell out of them to make your own soap

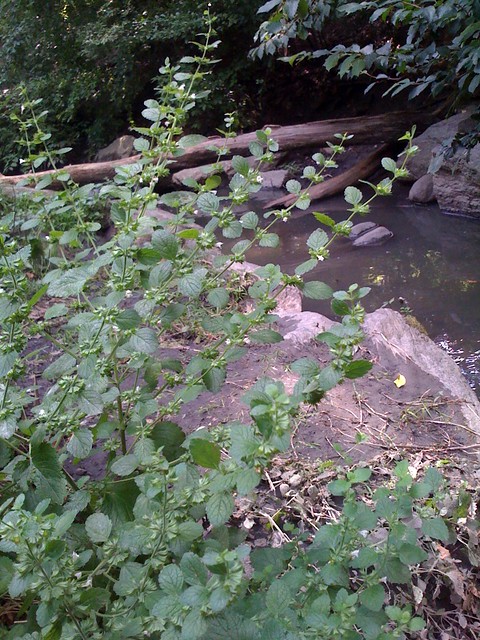
18. Lemon Verbana relative – We couldn’t identify the plant that grew along the running water near the Lasker Pool. It had a somewhat citrus smell, but it wasn’t mint because it wasn’t minty enough, nor was it lemon verbana because it didn’t have pointy leaves. Can you help?

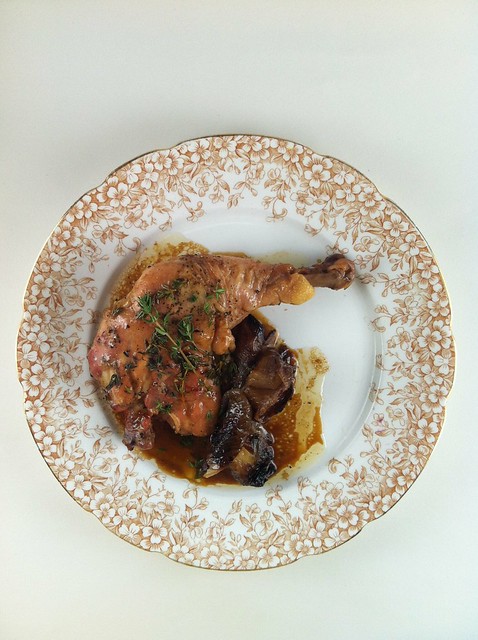
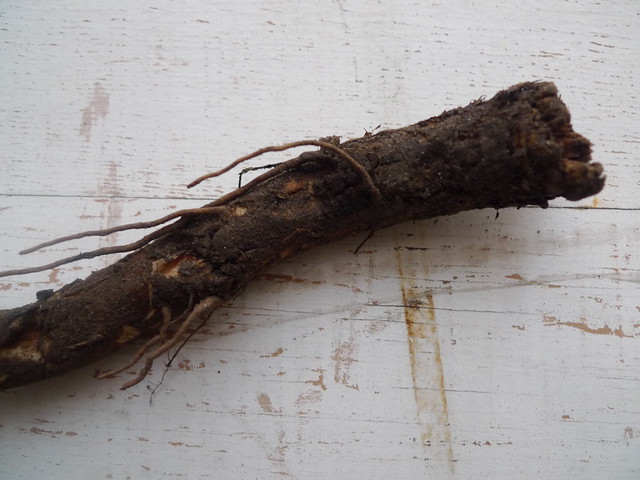
19. Burdock – I first had burdock at The Tasting Room. I miss that place. They were cooking farm-to-table style years before every blogger started using that term.

Although you won’t be on your hands or knees during the foraging trip, I highly recommend bringing a knife. I have a sample of the Ikon Folding Gentleman’s knife from the generous people at Wüsthof and I love it. It’s small enough to pack, yet very hefty and reliable when you’re cutting and slicing tougher items like burdock. Folding it back in takes a little getting used to–something my gentleman had to teach me to avoid accidentally cutting myself–but as soon as I got the hang of it, it was easy to reveal the 5-inch knife and fold back into the smooth Blackwood ebony handle.

Related post/s:
Wildman Steve Foraging photos on Flickr
A 2003 review of The Tasting Room

Recommended tool/s:
Sign up for a foraging tour with Wildman Steve
Williams-Sonoma sells the Ikon Folding Gentleman’s Knife

SousVide Supreme

I’ve been M.I.A. for the last seven and a half weeks so it’s great to be writing again. I’m now moved in to my new apartment–all boxes have been unpacked and the contents reorganized. I’m extra proud of my kitchen because I’ve made it my own even though I had to work with a lot of limitations (co-op rules and, not to mention, my dwindled budget). After sixteen years in New York City, I’m glad to finally call something my own.

When the SousVide Supreme was delivered to my door, I was afraid to open up yet another box of something. It sat in the kitchen with all my other stuff until I was finally comfortable enough to cook amid the chaos. It was honestly the perfect machine for someone as busy and scattered as I was. All I had to do was fill it with enough water to submerge the vacuumed-sealed meat I was about to cook, set the recommended temperature and wait for it to be ready. The whole time I was “waiting”, I was finishing tasks I had to do, cleaning up around me and living my usual routine of work and sleep. The only heavy lifting involved is vacuum-sealing and setting aside the time to submerge the meat and remember to remove and eat it.

If you watch Top Chef, you’ve seen enough sous-vide cooking in the last year. It’s French for “under vacuum” and it’s cooking vacuum-sealed anything in a water bath set to a very low temperature. The cooking time is longer, but the temperature is consistent which may give you the impression that you really can’t mess anything up. You still can, as evidence to my duck breast story below, but with enough practice, you too can impress Thomas Keller with how evenly-cooked sous-vided meats are. (There’s your new word of the year: sous-vided!) For those who love their grill marks and roast smell–and don’t we all?–you can finish cooking by searing the meats before serving. It’s an extra step but could be worth it for presentation purposes and peace of mind.

My main concern is how much vacuum-seal bags you need to purchase when you get into this whole sous-vide craze. You’d have to buy yet another gadget for your kitchen to seal whatever you want to sous-vide, and with every piece of meat or vegetable you have to make sure that you have a bag in stock. One just has to weigh the costs of vacuum-seal bags for sous-vide against the energy spent cooking if you do it the regular way. It may be worth it if you don’t ever want to worry about correctly roasting a whole chicken ever again.

For our first try, the Dr. picked up a whole duck (I didn’t have the free time!) and we invited two of our favorite people over for dinner. The night before, we minced and mixed all the marinade ingredients together and put them all in the bag with the duck breast and the legs. Fresh thyme, bay leaves, onions and garlic with some salt and pepper were all we need. Our mistake was putting all the duck pieces in one bag. I don’t know what came over us; we’ve cooked many ducks before and it still baffles me why we didn’t think of separating the pieces so that we could remove the duck breast from the water bath hours earlier than the legs. The legs came out nicely, like confit, but the breast was tasteless and dry because we had overcooked it. Alas, there is still such a thing as overcooking even with the SousVide Supreme.

With the duck, we also sous-vided fennel, Brussels sprouts, parsnips and roasted beets. I don’t think we would have noticed the difference if we just roasted the vegetables like we usually do, but it certainly didn’t hurt that we added them in the mix.

If it ruined our duck breast, I wondered what it would do to chicken breast. I mixed some of the herbs and spices I already had in my cupboard and sous-vided four boneless chicken breasts for almost five hours. The result was very moist meat that stayed moist even after two days in the fridge. We ate the chicken as they were that night, but ate the leftovers the day after and the next and I couldn’t believe how moist they still were. Just for that, I would love to own my own SousVide Supreme so I can begin to love chicken again.

If there is one thing I need to correct when I sous-vide chicken however, it would be to make small incisions all over the meat before I seal them in a bag. Although cooked for several hours, there was still a watery bloodbath as soon as we sliced the meat the first time. This was no big deal to me but it could turn off a lot of diners.

I’ve also had sous-vide eggs before and I wanted to recreate how full and yellow the yolks were while the whites stayed delicately soft. Sure it’s easier and quicker to just soft-boil them, but with the SousVide Supreme, there is no need to worry that your soft-boiled eggs will become hard-boiled eggs. They were perfectly custardy and set beautifully against frisée and mixed greens. Is it worth spending an hour cooking eggs? Probably not, but you’d have to be a super geek about your food to appreciate how pretty soft-boiled eggs could be.

We unfortunately didn’t have enough time to try it with beef, lamb or pork which was inexcusable because I actually already had Korean beef ribs marinating in the fridge. I had to return the SousVide Supreme back to its rightful owners. Clean-up was almost non-existent. I poured out the water and wiped the inside of the machine dry with a kitchen towel. It as fun as long as it lasted.

Did I mention that I just moved in to a new apartment and could use a housewarming present? I have the perfect counter space for it.

Related post/s:
Welcome to my new home in Harlem, New York

Recommended tool/s:
The SousVide Supreme is available for you home cooks for under $500

Hot Sauce Test

Ever since I started commuting to Connecticut for work, I started doing my grocery shopping at the Grand Central Market in Grand Central Terminal. I’m usually in and out, picking fresh produce for what I’m planning to cook for dinner, but one day I spent a leisurely time inside investigating the other specialty products the different purveyors sell. One thing that jumped at me was the number of hot sauces for sale. They caught my eye because they came in unique packaging and different shades of reds and oranges. With the help of Grand Central Market’s public relations firm, I was able to sample different hot sauces and compare them with what I already had at home.

Check these from left to right and buy your favorite just in time for the Super Bowl:

1. Ass Blaster hot sauce from Southwest Specialty Food
This came in the most amusing packaging. The bottle is inside a replica of the actual outhouse at the company’s Arizona headquarters. It reminded me of a coffin so tasting it actually made me nervous. The Ass Blaster is fierce on the front of your tongue and it stays there for a long time while you’re eating. I’m sure it would blast my aSs if I have plenty of it.

2. Chimay Salsa Habañero
I like Tabasco sauces because of their vinegary taste. This is a little smokier than the yellow kind I already have and love so even though it’s stingy, the spiciness is short-lived and very tolerable.

3. Kaiska bulls habañero in tequila sauce
This is very interesting because it’s chunky and comes with onions. Despite the name, it has no alcohol in it even though it comes from the agave azul plant, the base ingredient for tequila. I use Kaiska as a condiment because there’s a little bit of sweetness to it that’s great as a rice topper.

4. Mazi Piri Piri sauce
Most commonly known as sauce from Portugal, the chiles are actually used a lot in East African stews and is great as marinade. Piri piris, meaning “very yellow” in Gujarati (after the Portuguese colonies in India), look a lot like Thai chili peppers–small in size but very powerful in heat. It’s also very oily. I noticed that when setting up the photo below: its “legs” are longer on the plate. The packaging is quite a bitch to open because it’s sealed with wax. I had to use a bottle stopper to store it but if you use it as a marinade, you’d probably end up using all of it at once anyway.

5. Valentina hot sauce
I associate Valentina hot sauce with tacos especially here in East Harlem. It’s easily the condiment that’s always present on eat-in counters in taquerias. I once sent my friend Anna a bottle of this straight from Mexico City but didn’t pack it well enough that she basically received a glob of hot sauce on her doorstep. This is probably the most tolerable hot sauce for me in this batch because I’ve had enough of it.

6. Louisiana jalapeño hot sauce
This is also very tangy, though not as spiky as the Chimay. The heat goes in the back of your tongue which may seem nothing at first but begins to kick while you’re chewing your food. The good thing about Louisiana is that it never overpowers the food you’re eating.

7. Cholula chipotle sauce
Chipotle is a dried jalapeño pepper that’s also been smoked. It’s mostly used in Tex-Mex cuisines. Though that’s not at the top of my Mexican food list, I like using Cholula when I make Subanik, a Guatemalan stew I learned to make from Francis Ford Coppola’s resort, to mix with the ancho chiles.

Note that on the photo above, the third and fourth dollop have actually been switched. The chunkier and darker one is from Kaiska; the more orange is piri piri. You can buy #1, #4, #7 from Grand Central Market. My friend Corey brought back #2, #3 and #5 from his last business trip to Mexico, though #5 is available in bodegas in most neighborhoods with a large Mexican population. I bought #6 from the New Orleans School of Cooking.

Related post/s:
Check out the Grand Central Market in Grand Central Terminal
Call the New Orleans School of Cooking and they can ship a box of their best hot sauces anywhere in the United States
This Guatemalan stew brings back memories